


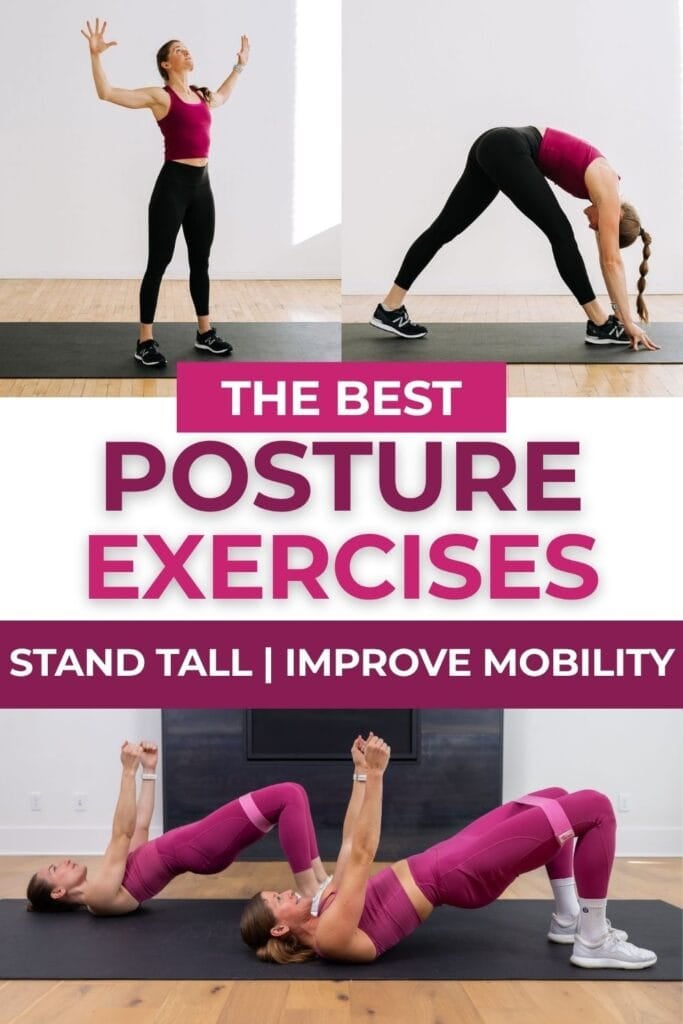
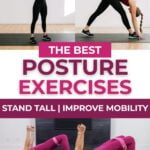
12 Exercises for Better Posture
Dealing with nagging pain in your mid or lower back, neck or shoulders? There’s a good chance it’s not an injury; it might just be your posture catching up with you. I rely on these 12 exercises to undo the strain from long hours at my desk and the not-so-ergonomic positions I end up in chasing my kids around all day. These moves, along with a few simple tips, can help you improve your posture, move more freely and keep doing what you love for the long run.
As a wife, mom and business owner, I know how hard it can be to figure out what actually deserves priority in a workout. For me, mobility is at the top of the list, and good posture goes right along with it.
That’s why I focus on these specific exercises – they target the muscle groups that tend to take a hit when my posture slips.
Building strength and moving through the entire range of motion during this routine activates and releases tension in my neck muscles, lower body and mid to lower back.
What to Know About These Exercises
These exercises use extension and retraction to move your body through its full range of motion and focus on holding a position to open/stretch specific areas of your body, like your upper, mid and lower back. The risk of injury is low due to minimal impact and intensity, but be sure to contact your healthcare provider if you are recovering from an injury.
Equipment
While you don’t need any equipment for these exercises, there are some optional pieces of equipment to have on hand: A yoga mat (for comfort), yoga blocks (if there is a lack of mobility), a foam roller and a light resistance band.
Instructions
Flow through these exercises at your own pace. As a general guideline:
- Beginner: Hold each mobility exercise for around 15-30 seconds.
- Intermediate: Hold each mobility exercise for around 30-60 seconds.
- Advanced: Hold each mobility exercise for around 60-90 seconds.
Posture Exercises Outline
1. Child’s Pose
Targets: Lower back, inner thighs, hips, shoulders, chest, triceps, lats, abs, obliques and core.
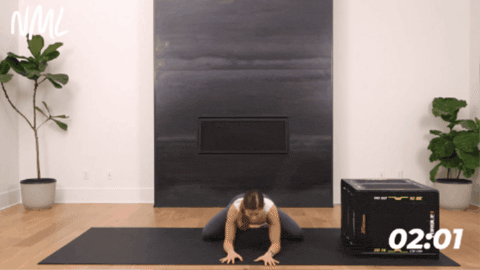
How to Do a Child’s Pose
- Start in a high plank position, shoulders stacked over wrists, core engaged, pulling up on your kneecaps to engage your quads. Create a straight line from the head to the toes through the torso.
- Drop your knees to the mat and shift your weight back. Push your hips back towards your heels to sit back into child’s pose. Keeping your arms extended out away from your body, as you drop your forehead to the mat.
- Take a big inhale in child’s pose.
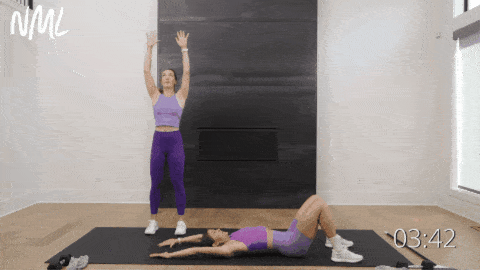
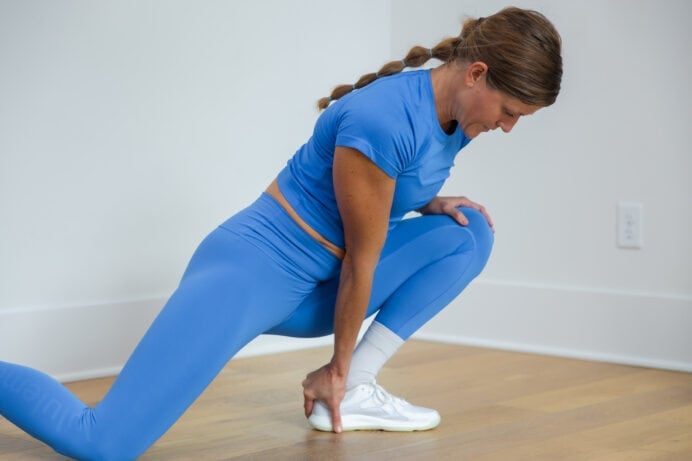
2. Forward Fold
Targets: Hamstrings, glutes and lower back.

How to Do a Forward Fold
- Start standing in Mountain Pose, feet hip-distance apart (or wider if needed), toes pointing straight ahead.
- As you inhale, reach your hands overhead.
- As you exhale, soften your knees and slowly fold forward from your hips. Push your hips back towards the wall behind you.
- Keep a soft bend in your knees as you reach your fingertips towards the mat.
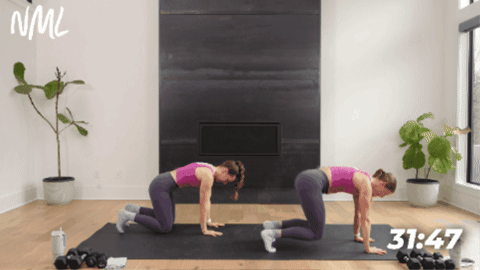
3. Cat Cow
Targets: Spine and low back.
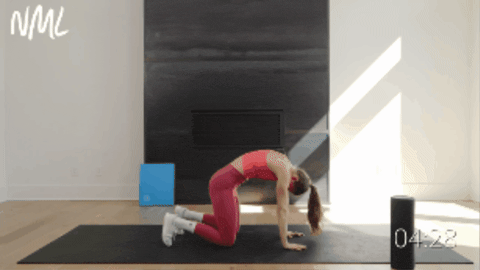
How to Do a Cat Cow
- Start in a table top position (quadruped) on all fours. Shoulders are stacked over wrists and hips are stacked over knees.
- Find a neutral spine — think of the spine as a straight line connecting the shoulders to the hips. Keep the neck long by looking down and out.
- As you inhale, find an arch pose by curling your toes under and tilting your pelvis back so that your tailbone sticks up. Drop the belly down as you draw your navel in.
- Take your gaze gently up toward the ceiling. This is cow pose.
- On your exhale, round out for cat pose. Release the tops of your feet to the floor and tuck your tailbone.
- Draw your navel toward your spine and drop your head, gazing toward your navel.
- Repeat this sequence of arching and rounding out for the time at your skill level.
4. Chest Opener
Targets: Upper body (specifically the chest muscles).
How to Do a Chest Opener
- Lie on top of the foam roller vertically. Have the roller positioned between your shoulder blades (in the middle of your back). If your foam roller is not long enough, add a yoga block to make sure your neck and head are also supported.
- Inhale to prepare. As you exhale, open your arms towards your sides, letting your arms fall open to open the chest.
- Hold this pose, arms extended out to the sides. Option to “goal post” your arms (90-degree bend at the elbows) to intensify this chest opening stretch.
5. Bird Dog
Targets: The entire posterior chain (or backside of your body).
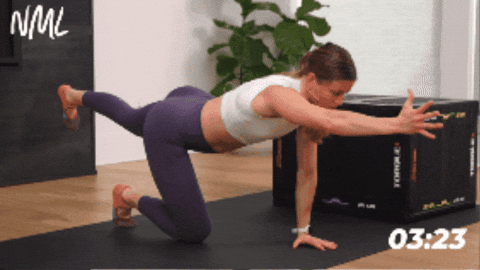
How to Do a Bird Dog
- Find a quadruped position with your knees hip-width apart and hands firmly on the ground, about shoulder-width apart. Engage your core.
- Find a bird dog position by extending your right leg back, floating it off the ground. As you extend the right leg back, extend the opposite arm, the left arm, straight out in front of you.
- Hold the right leg back and left arm out for a moment, then return to the starting position on all fours.
- Then repeat this movement on the other side of the body, extending the left leg long and the right arm straight out in front of you.
6. Reverse Table Top
Targets: The front side of the body, specifically opening up the chest, shoulders, neck and hips.
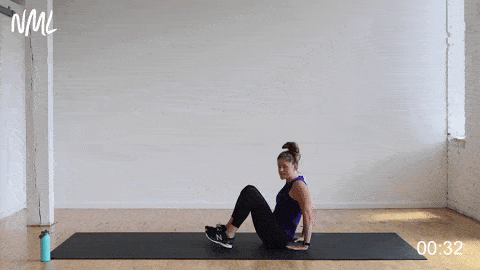
How to Do a Reverse Table Top
- Start seated on the ground.
- Place your hands behind you on the mat, shoulder-width apart, fingers pointing towards you (fingers facing your butt) and legs bent at 90 degrees in front of you.
- Lean back as you lift your hips up towards the ceiling while pressing firmly into your hands and feet. Arms straight.
- Hold at the top with knees at a 90-degree angle and thighs and torso parallel to the floor.
- Let your neck fall back as you open the front side of your body, holding this reverse tabletop pose.
7. High Plank
Targets: Transverse abdominals, upper abs, lower abs and shoulders.
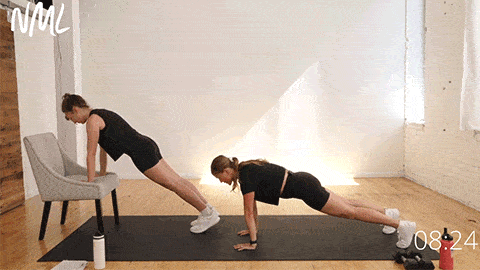
How to Do a High Plank
- Start in a table top position with shoulders stacked over wrists (soft bend in the elbows) and hips over knees. Hands are planted firmly on the mat, weight evenly distributed between all 10 fingers.
- Then step both feet back, legs extended long, balancing on your toes. Pull up on your kneecaps and push back on your heels to keep your core engaged.
- Hold this plank position, maintaining a straight line with your body, gaze slightly in front of you.
Modification: Place your hands on a raised surface (such as a chair, couch, or countertop) or on your forearms if you suffer from wrist pain.
8. Downward-Facing Dog
Targets: Arms, shoulders, quads, back and core.
How to Do a Downward-Facing Dog
- Start in a table top position (quadruped) on all fours; shoulders stacked over wrists and hips stacked over knees.
- Actively press your hands into the mat as you tuck your toes under.
- As you exhale, lift your knees off the mat, straightening your legs as you press your hips up towards the ceiling.
- Hold this position, pressing your chest towards your thighs.
Modification: If this inversion is uncomfortable, try quadruped (tabletop) hip circles. Or move onto puppy dog stretch, which is just a slight inversion with the heart just higher than the head.
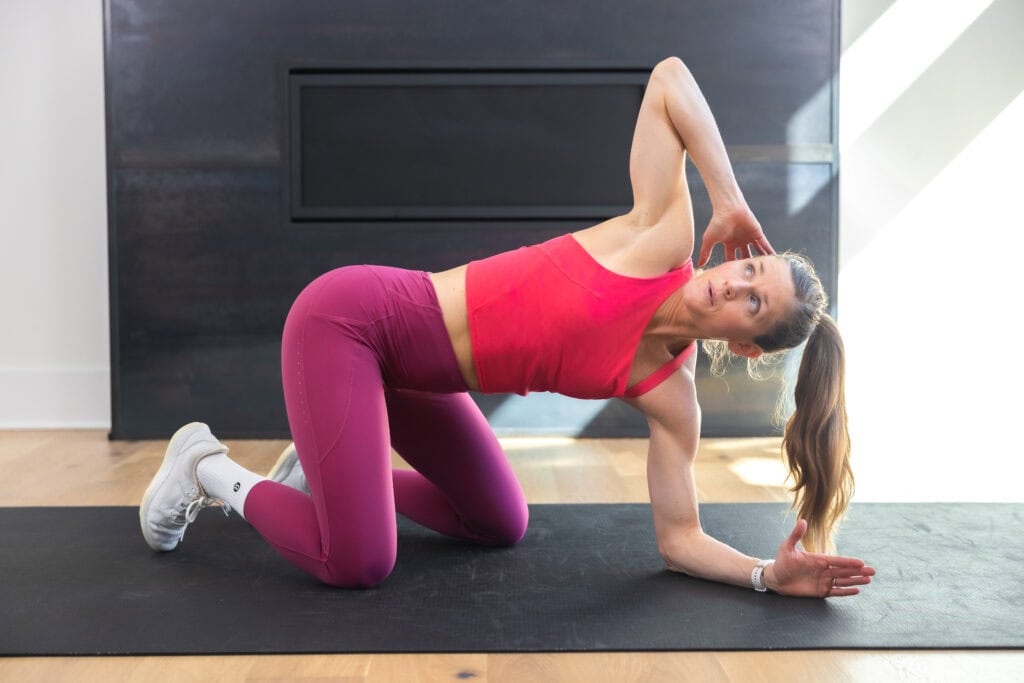
9. Thoracic Spine Rotation
Targets: Internal and external obliques, erector spinae and deep core muscles.
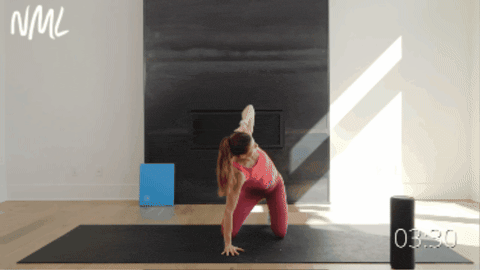
How to Do a Thoracic Spine Rotation
- Begin on your hands and knees in a quadruped position. Your hands should be directly under your shoulders, and your knees should be under your hips.
- Place your left hand behind your head and gently press into your head with your fingertips. Keep your elbow pointing out to the side.
- Inhale to prepare. As you exhale, slowly rotate your left elbow and shoulder open, lifting your left elbow towards the ceiling. Gaze follows left elbow. Keep your hips even and stable. Rotate only as far as you can without straining or causing discomfort.
- Then, on an exhale, reverse the movement, bringing your left elbow down towards your right wrist.
10. Superman
Targets: Erector spinae muscles (which run along the spine), glutes, hamstrings, shoulders and core muscles.
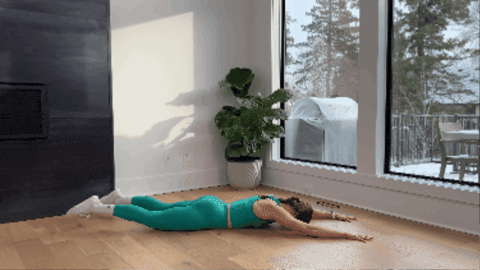
How to Do a Superman
- Lie face down on a mat or flat surface with your legs straight out behind you. Then, reach your arms overhead, extending your hands away from your body. Keep your neck in a neutral position by looking down towards the floor.
- Take a deep breath and engage your core muscles to lift your arms and chest off the ground simultaneously.
- Hold the top position for a second, squeezing your glutes and lower back muscles to keep your chest lifted.
- With control, lower your upper body towards the mat, returning to the starting position.
Modification: Perform a bird dog exercise, extending the opposite arm and the opposite leg away from each other in a quadruped position.
11. Prone Angels
Targets: Rotator cuff, trapezius (traps) and latissimus dorsi (lats).
How to Do Prone Angels
- Start lying on your stomach, heels pointed toward the ceiling with the tops of your feet flat on the ground and arms extended straight overhead. Fingers and palms resting on the mat.
- Flex your core and lift your face, upper chest and arms off the mat.
- Aiming to keep your arms straight and parallel to the ground, slowly bring your arms down until your hands touch your hips (like you are making a snow angel).
- Then return your hands to the starting position overhead.
- Repeat this sequence with controlled reps as many times as possible.
Modification: Can be done from a standing position.
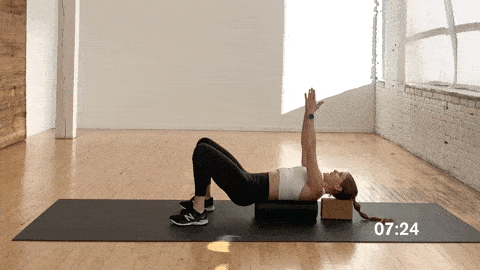
12. Glute Bridge
Targets: Hip abductors (outer glutes and thighs), gluteus medius and gluteus minimus (upper and side glutes).
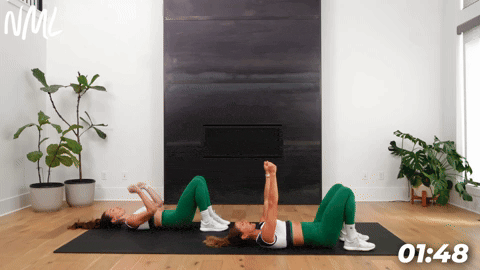
How to Do a Glute Bridge
- Lie flat on the floor on your back with your knees bent and feet flat on the ground, feet hip-width apart.
- Press through the heels to lift your hips off the ground until your knees, hips and shoulders form a straight line.
- Keep your abs drawn in, belly button pulled towards the spine, so you don’t overextend your back.
Common Mistakes to Avoid
There are some small, but specific adjustments and things to avoid that will improve your posture and body awareness throughout your day:
- Slouching while sitting
- Forward head posture or “tech neck” from looking down at devices
- Standing with hips pushed forward
- Overarching the lower back
- Overcorrecting posture (too stiff and rigid)
- Sitting too long without moving
- Carrying weight unevenly (one-shoulder bags, uneven loads)
- Poor desk/workstation setup
- Mindless movement (lack of body awareness during daily activity)
Additional Tips
Here are some cues to help remind you to keep your posture balanced throughout daily life:
- “Stack your ribs.” Keep your spine neutral and prevent over-arching or slouching.
- “Own your position.” Whether sitting, standing or lifting — be intentional.
- “Move, don’t stay locked.” Good posture isn’t rigid; shift positions every 20-30 minutes.
- “Brace your core.” Activate abdominal muscles and support your spine without stiffness.
- “Pull your shoulders back and down (gently).” Avoid shrugging or rounded shoulders to engage the upper back instead of letting your shoulders roll forward.
- “Squeeze your glutes.” Engage hip stabilizers like the gluteus medius and help align your pelvis to reduce low back strain.
FAQs
What causes bad posture?
Things like sitting for long periods, poor movement habits and muscle imbalances are the root cause of postural issues. Weak stabilizers like the gluteus medius and tight muscles from repetitive positions are also a major contributor. Overall lack of strength, mobility and body awareness all contribute to posture breakdown and are usually a result of being stagnant.
Can you correct years of bad posture?
In short, yes! Though it takes time and consistent effort, you can correct years of bad posture by strengthening key muscles like the erector spinae and improving mobility and range of motion. This will gradually restore better alignment and movement patterns, but progress is dependent on good daily habits, awareness and regular corrective exercises.
Can posture affect the vagus nerve?
Yes, your posture can influence the vagus nerve. Poor posture (slouching or forward head position) affects breathing mechanics, neck alignment and tension around the chest and diaphragm. This can also contribute to shallow breathing and increased stress responses. Proper posture supports better vagal tone and relaxation, which can enhance nervous system balance and recovery.
Can physical therapy correct posture?
Physical therapy is a great and effective way to correct posture! Physical therapists address root causes (such as muscle imbalances, limited mobility and poor movement patterns) by strengthening key support muscles like the erector spinae and gluteus medius with simple exercises. With regular exercises, posture education and habit changes, most people can see meaningful and lasting improvements to their overall well-being.
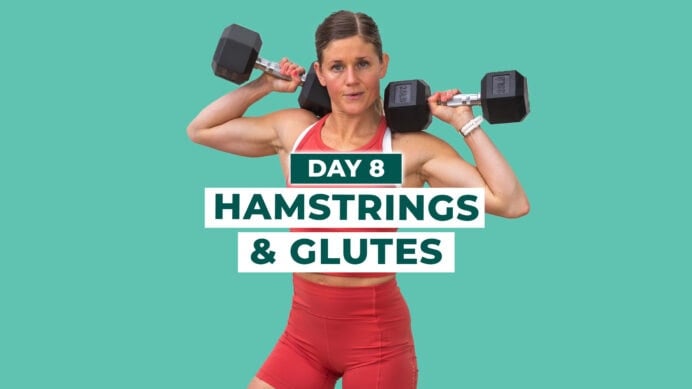
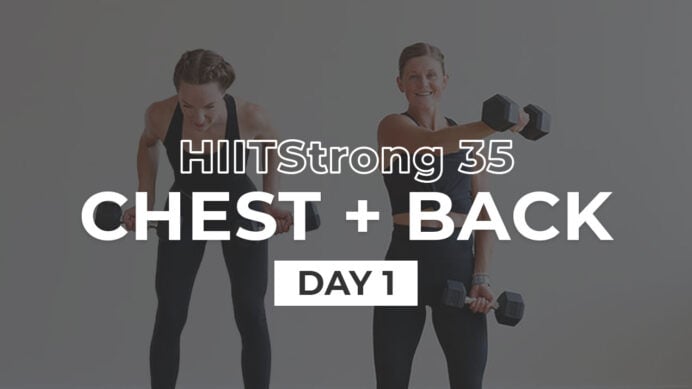
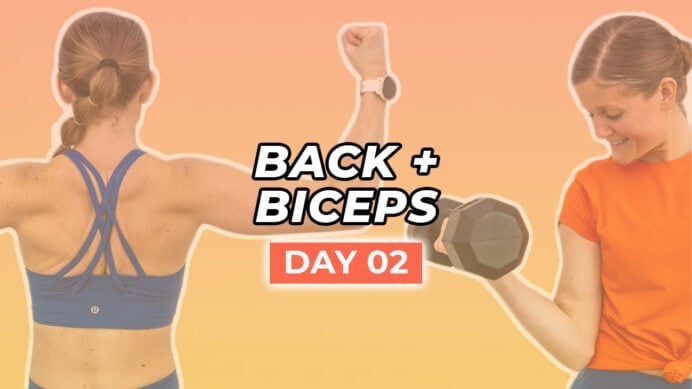
More Workouts
Upper BodyPin This: Improve Your Posture With These 12 Exercises
This post includes affiliate links. I do earn a commission for products purchased using these links (at no additional cost to you). Thank you for supporting Nourish Move Love, making the content you see on this blog possible.
no comments

Leave a Comment