


Best Ab Workouts: 12 Exercises to Tone Your Core
This ab workout is designed to strengthen and define the entire core through functional, full-range movements that mimic how the body moves in everyday life. Each exercise targets multiple layers of the core to improve stability, posture and overall strength. It’s ideal for anyone, especially busy moms, who want to build real, functional core strength that supports daily activities and reduces common aches and pains.
As a mom and a certified personal trainer (CPT), I’ve learned that a strong, defined core isn’t built from endless crunches – it’s built through purposeful, functional movement. When I train my abs, I focus on how those muscle groups actually work in real life.
The core isn’t just 1 flat muscle; it’s a complex network that wraps around the entire trunk of the body – the front, back and sides. These muscles stabilize every step, lift, twist and reach I make throughout the day.
For me, the most effective ab workouts are the ones that teach my body to move as a connected system. Exercises like planks, dead bugs and bear crawl variations don’t just “work the abs” – they engage multiple layers of core muscles at once. That’s what creates strength that actually carries over into daily life. When the core is trained functionally, it learns to fire properly to support the spine, control movement and protect the body from strain.
If you’re a beginner, I recommend starting with foundational core exercises that teach control and proper activation before adding intensity. Modified planks, glute bridges, bird dogs and dead bugs are great starting points because they strengthen the deep stabilizing muscles without putting unnecessary strain on the lower back.
I’m often asked about targeting the lower abs specifically. Keep in mind that core training is less about isolating 1 area and more about how the lower core activates during movement. Exercises like leg lowers, reverse crunches and controlled mountain climbers are especially effective because they train the lower core to stabilize the pelvis and support the spine.
In terms of frequency, I’ve found that consistency matters more than duration. I like to train my core 3-4 times a week, either through dedicated ab sessions or integrated into full-body workouts. The key is giving the muscles enough time to recover while keeping them actively engaged through daily movement.
I’ve seen firsthand how this kind of training changes everything. Core training is not just about how my abs look, but how my body feels. A strong core keeps me from experiencing the common aches and pains that used to slow me down. It helps me move more efficiently, maintain better posture and feel more stable whether I’m working out or chasing my kids around.
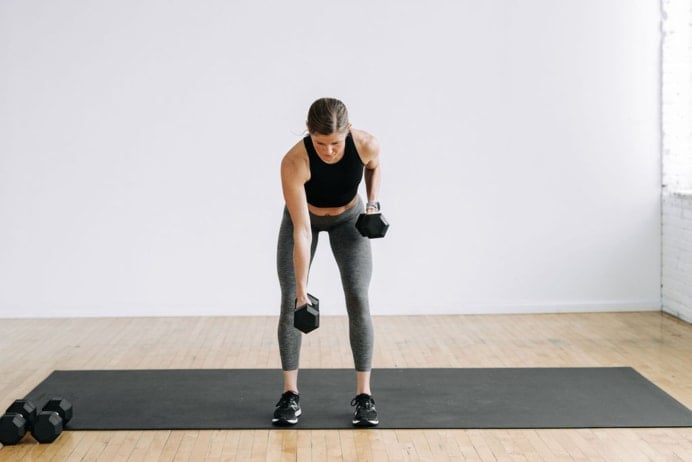
Workout Equipment:
The majority of these are bodyweight exercises. That said, you have the option to add a medium set of dumbbells to a few of the exercises to increase the intensity.
Workout Instructions:
Note that this is a list of my favorite core exercises. If you prefer a guided home workout video (complete with a warm-up and cool-down), try these 9 Ab Exercises.
How To Use This Ab Workout:
- Beginner: 30 seconds work, 15 seconds rest. Perform each exercise x1 set.
- Intermediate: 40 seconds work, 20 seconds rest. Perform each exercise x2 sets.
- Advanced: 45 seconds work, 15 seconds rest. Perform each exercise x3 sets.
Workout Outline
1. Plank
Targets: Transverse abdominals, upper abs, lower abs and shoulders.
How to Do a Plank
- Start in a table top position with your shoulders stacked over your wrists (soft bend in the elbows) and your hips over your knees. Your hands are planted firmly on the mat, weight evenly distributed between all 10 fingers.
- Step both feet back, legs extended long, balancing on your toes. Pull up on your kneecaps and push back on your heels to keep your core engaged.
- Hold this plank position, maintaining a straight line with your body, gaze slightly in front of you.
Modification: Find a modified plank by placing your hands on a raised surface (such as a chair, couch, or countertop). If you experience wrist pain during planks, you can place your hands on a sturdy pair of dumbbells.
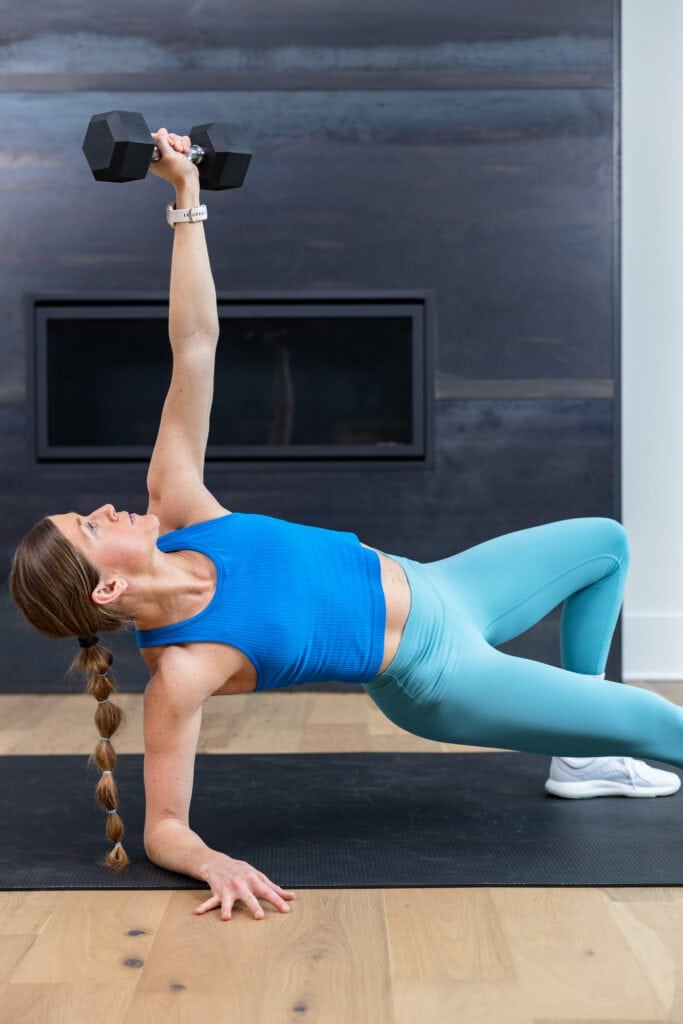
2. Side Plank
Targets: Internal and external oblique muscles (the muscles that run along the side of your core) and transverse abdominus.
How to Do a Side Plank
- Start lying on your side, right forearm on the mat, right shoulder stacked over right elbow.
- Press into your forearm and lift your hips, aiming for straight legs. Balance on the outside edge of your right foot, stacking your left foot on top of your right foot. Option to stagger your feet if stacked isn’t comfortable.
- Place your left hand behind your head or extend your left hand overhead. Focus on keeping your hips high and even (stacked over each other).
- Hold for the timed interval. Switch sides on the next set.
Modification: Drop the inside knee to the ground rather than extending both legs.
3. Mountain Climbers
Targets: Upper abs, lower abs, obliques, shoulders, glutes and thighs.
How to Do a Mountain Climber
- Start in a high plank position with your shoulders stacked over your wrists, and your weight evenly distributed among all 10 fingers. Pull your kneecaps up towards your belly.
- Hold this position, maintaining a straight line with your body, gaze slightly in front of you.
- Drive your right knee towards your left elbow before quickly driving your left knee towards your right elbow.
- Continue this pattern, alternating knee drives towards your chest at a rapid pace, as if “running” in a plank position.
Modification: Perform standing goblet marches.
4. Alternating Leg Lowers (Or Leg Raises)
Targets: Rectus abdominis, transverse abs, lower abs, hips and thighs.
How to Do an Alternating Leg Lower (or Leg Raise)
- Start lying on your back with your core braced. Press your lower back firmly into the mat and think about “wrapping” your abdominal wall around your core. Keep your head, neck and shoulder blades relaxed on the floor.
- Straighten your legs and lift them so they’re stacked over your hips, feet pointed toward the ceiling. Extend your arms long by your sides with your hands resting on the mat for support.
- Slowly lower one leg toward the ground, keeping both legs as straight as possible. Focus on maintaining contact between your lower back and the mat the entire time.
- Hover your heel just above the floor, then lift that leg back up to the starting position using your core – not momentum.
- Repeat on the opposite leg, alternating sides with control.
Modification: Bend both knees, shortening the distance each leg travels.
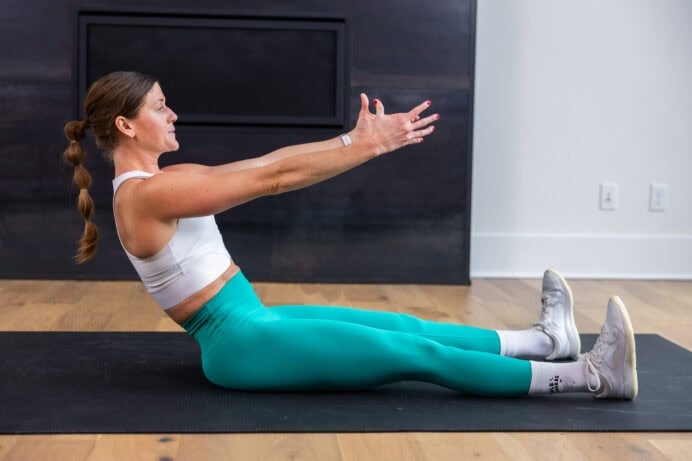
5. Seated Twist (Russian Twist)
Targets: Upper abs, lower abs, obliques, core and hips.

How to Do a Seated Twist
- Start in a seated position, sitting on your sit bones as you lean back; heels resting on the ground (option to float 1 or both feet to increase intensity).
- Pull your right elbow back towards your right hip as you rotate through your torso to tap your hands to the mat near your right hip.
- Use your obliques and abs to return to center.
- Then reverse the movement, pulling your left elbow back towards your left hip as you rotate through your torso to tap your hands to the mat near your left hip.
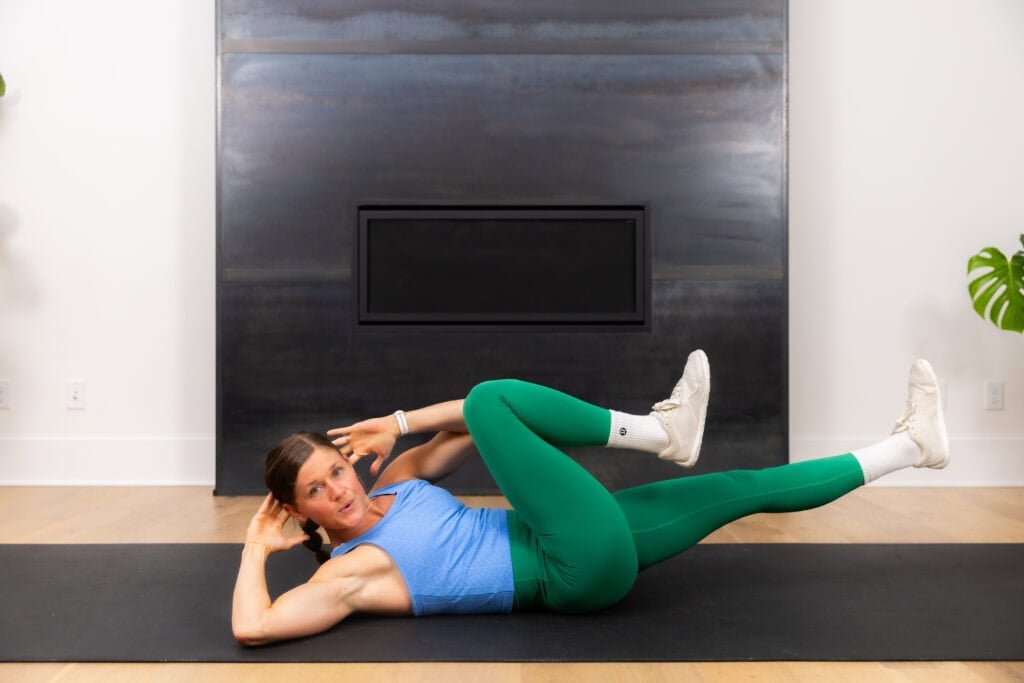
6. Bicycle Crunch
Targets: Rectus abdominis, transverse abdominal muscles and obliques.
How to Do a Bicycle Crunch
- Start lying flat on your back, lower back pressing firmly into the mat. Bring your legs to a raised 90-degree bend.
- Lift your head, neck and shoulders off the ground. Place your hands behind your head and think about pressing your head into your fingertips.
- Lift your right elbow towards your left knee as you extend your right leg long.
- Slowly return to the starting position and repeat on the other side. Pull your left elbow towards your right knee as you extend your left leg long.
- Continue to repeat this ‘bicycling’ movement, alternating knee to elbow crunches.
Modification: Perform with knees bent, reducing the range of motion.
7. Reverse Crunch
Targets: Lower abs, lower back, hips and spine.
How to Do a Reverse Crunch
- Lie on your back, core engaged. Hold a single dumbbell horizontally between both hands. Extend your legs and arms away from each other, floating them off the mat.
- Squeeze through your abs to crunch the dumbbell from overhead to your chest.
- At the same time, pull your knees in towards your chest, heels floating off the ground and knees bent.
- Hold for a moment, then reverse the movement. Extend your arms and legs away from each other, returning to the starting position.
Modification: Shorten the range of motion to reduce the intensity of the exercise. Hold 1 dumbbell horizontally overhead and pull the knees in towards your chest.
8. Scissor Kicks
Targets: Lower abs, transverse abdominis, hip flexors, obliques (through anti-rotation), upper abs and light shoulder engagement from the dumbbell transfer.
How to Do a Scissor Kick
- Start lying on your back with your core braced, legs extended and a light dumbbell held securely in both hands. Lift your shoulders slightly off the floor to engage your upper abs.
- Extend your legs long and hover your heels a few inches above the ground. Keep your lower back pressed into the mat.
- Begin the scissor motion by lifting 1 leg up while the other hovers low, switching them in a smooth, controlled pattern. Keep the movement steady, not rushed.
- Add the weight transfer: As your legs switch, pass the dumbbell from hand to hand across your torso, moving it toward the side of the lifted leg. Each scissor becomes a cue to move the weight – left leg up, dumbbell to the left hand; right leg up, dumbbell to the right hand.
- Stay controlled through the entire movement. Keep your core tight, ribs pulled down and neck relaxed as you transfer the weight side to side.
- Continue alternating for the full interval or rep count, focusing on slow, strong movements rather than speed.
Modification: Option to omit the dumbbell transfer.
9. Bear Crawl
Targets: Deep transverse abdomen muscles, rectus abdominis (six-pack ab muscles), oblique muscles, shoulders, back, legs, glutes and quads.
How to Do a Bear Crawl
- Start in a table top position, quadruped on all fours, shoulders stacked over wrists and hips stacked over knees, pelvis even.
- Inhale as you let your belly slightly drop, raising your gaze up as you breathe through into your belly.
- Exhale, drawing your belly button towards your spine. Tuck your toes under and lift your knees 1 inch off the mat, finding a bear crawl.
- Hold this bear crawl position, then extend your right arm straight overhead, reaching out away from your body.
- Return your right palm to the mat and repeat on the other side. Extending your left hand away from the body and then returning it to the mat.
- Continue this pattern, alternating which hand is extended.
Modification: Hold a bear crawl for the timed interval. Option to perform a bird dog instead.
10. Dead Bug
Targets: Transverse abdomen (deep core muscles below your rectus abdomen or six-pack ab muscles), lower abs and hip flexors.
How to Do a Dead Bug
- Lie flat on the mat, performing a slight pelvic tilt to press your lower back into the mat and drawing your belly button towards your spine. Think about wrapping your abdominal wall around your midsection.
- Then bring your legs up, knees bent at 90 degrees, shins parallel to the floor. Extend your arms straight overhead, wrists stacked over your shoulders.
- Contract your ab muscles to engage your core as you extend your right arm overhead while simultaneously straightening your left leg. Return to the starting position.
- Then extend your left arm overhead while simultaneously straightening your right leg. Return to the starting position and repeat.
Modification: Reduce the range of motion to reduce the intensity. You can keep bends in both knees rather than kicking straight out to scale this exercise as well.
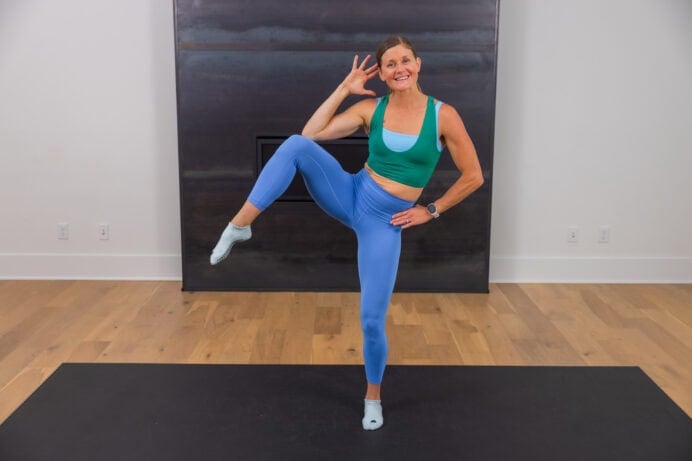
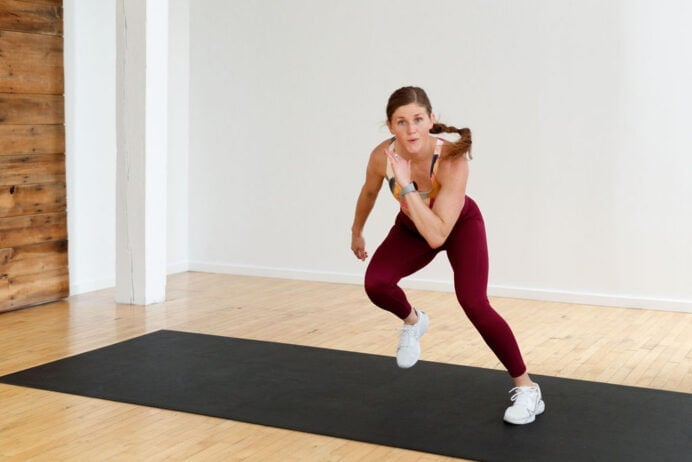
11. Standing Knee Drive and Rotation
Targets: Deep transverse abdominals, obliques, upper abs and lower abs.
How to Do a Standing Knee Drive and Rotation
- Start standing with your feet hip-width distance apart, shoulders stacked over hips and pelvis slightly tucked to engage the core.
- Transfer your weight into your left foot, then exhale as you drive your right knee up towards your chest.
- As your knee drives up, rotate your shoulders to the right, crunching through the right side abs.
- Slowly and with control, lower your right foot to tap the ground, straightening your upper body so your shoulders now face the front of the room, returning to the starting position.
Modification: Option to omit the spinal rotation, performing a standing knee drive instead.
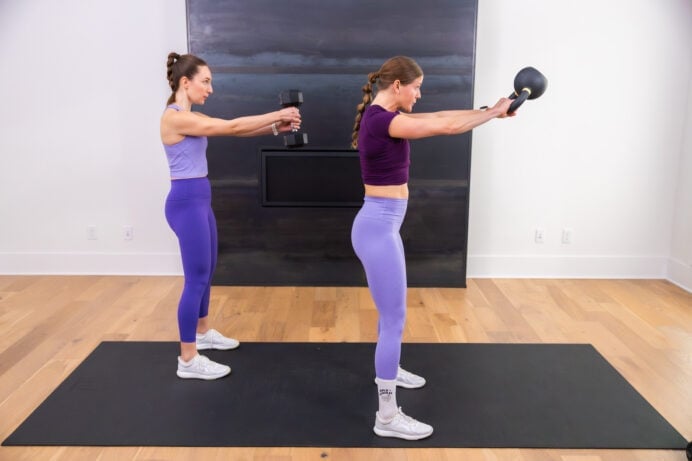
12. Wood Chop
Targets: Internal obliques, external obliques, deep transversus abdominis muscles, hips, back and shoulders.
How to Do a Wood Chop
- Start standing in an athletic stance, feet shoulder-width apart, soft bend in your knees, core engaged. Stagger your feet, so your left foot is slightly behind your right. Most of your weight is in your right foot.
- Hold 1 dumbbell horizontally between your hands.
- Bend your knees as you bring the dumbbell to the outside of your left knee.
- Exhale as you use your legs, hips, glutes, abs and obliques to drive the dumbbell crossbody, extending your arms up overhead on the right side. Think left knee to right shoulder.
- Lower the dumbbell with control back towards your left knee, returning to the starting position.
FAQs
Is a 20-minute ab workout enough?
Absolutely. If those 20 minutes are focused and intentional, that’s plenty of time to challenge and strengthen the entire core. I focus on quality over quantity, using functional, compound movements that build muscle by engaging multiple muscles at once. This approach builds real strength, stability and definition without needing hours in the gym.
Why do ab exercises hurt my back?
If ab exercises cause back pain, it’s usually a sign that the deeper core muscles aren’t engaging properly and the lower back is compensating. Slow down, check for proper form and focus on proper breathing and core activation before adding intensity. Strengthening the deep stabilizing muscles – like the transverse abdominis – can reduce back discomfort and make core work feel stronger and safer.
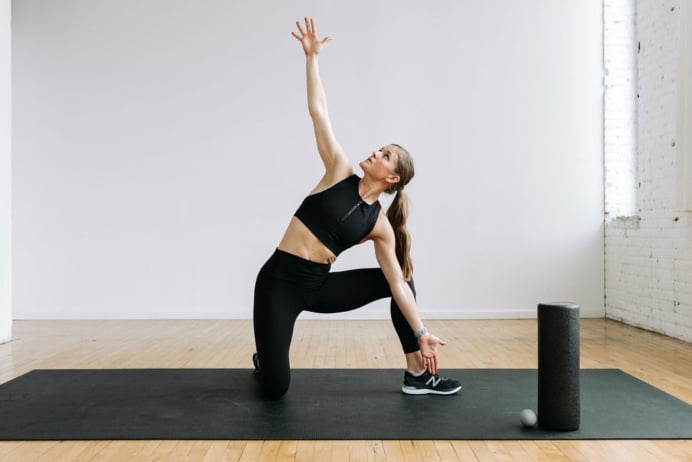
Should I add Pilates to my ab workout routine?
Pilates is a great way to complement traditional ab training because it builds deep, functional strength and body awareness. It targets the stabilizing muscles of the core through controlled, precise movements and helps improve posture, flexibility and balance.
Can I get a 6-pack in 30 days?
While it’s possible to make noticeable progress in 30 days, visible abs depend on more than just workouts. They’re influenced by nutrition, consistency and overall body composition and body fat. My focus is on building a strong, functional core that supports movement and reduces pain first. When you train that way consistently, you’ll start to notice definition as well.
Free 7-Day Ab Challenge
More Workouts
Core StrengtheningPin This: Best Abs Exercises to Tone Your Core
no comments

Leave a Comment