


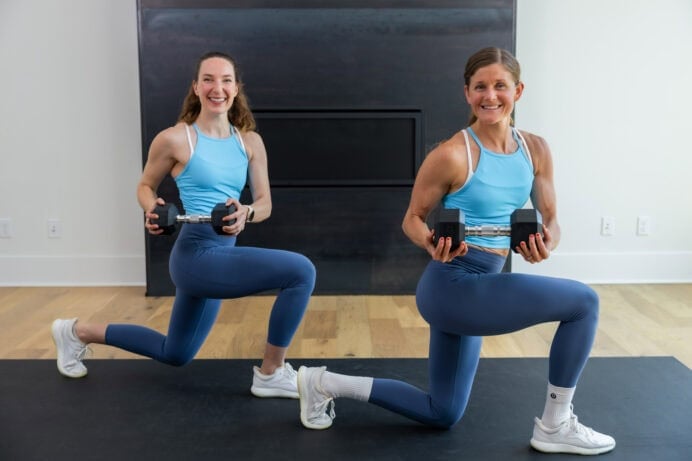
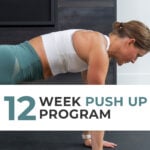
Push-Up Progression (12 Week Guide)
This 12-week push-up progression guide is designed to help you build upper-body and core strength so you can confidently progress from modified to full push-ups with proper form. It’s ideal for anyone looking to improve functional strength, posture and control through structured, at-home training. The plan includes gradual, strength-based steps – starting with wall and incline push-ups and ultimately mastering standard push-ups from your toes.
Quick Links:
LET’S GET STARTED
Download This FREE Push Up Program
Download the PDF calendar for this push up progression program to easily track your progress.
Download Plan
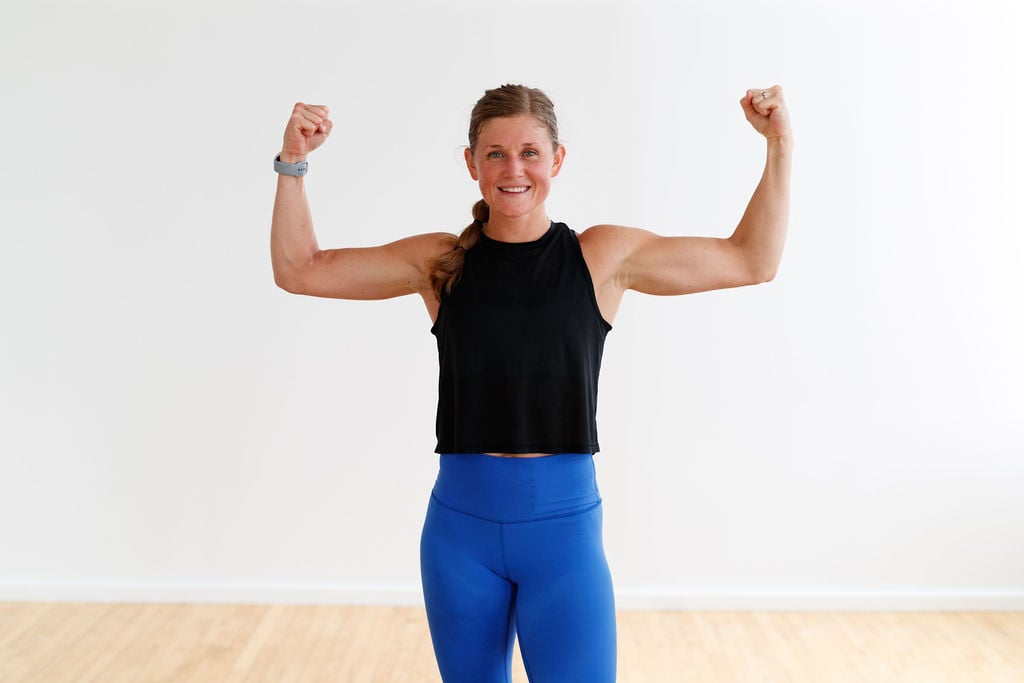
When I first started strength training, I couldn’t do a single push-up from my toes. It was humbling… and honestly, a little frustrating. But the push-up quickly became one of my favorite exercises because it challenged me in ways no other movement could. Over time, I realized that mastering a push-up isn’t just about upper-body strength – it’s about building total-body control and confidence.
Push-ups are one of the most challenging bodyweight exercises, especially for women. They demand strength from your chest, shoulders, triceps and core – all while maintaining good alignment from head to heels. Lifting your entire body weight using your upper-body and core strength is really tough for a lot of people… but because push-ups are so challenging, they’re a really rewarding exercise to master.
Push-ups are one of the most functional, full-body exercises you can do. Building strength through push-ups actually creates balance throughout the upper body, supports good posture and helps prevent shoulder and back pain. Plus, a strong chest and core make everyday movements like pushing a stroller, carrying a car seat or lifting groceries easier.
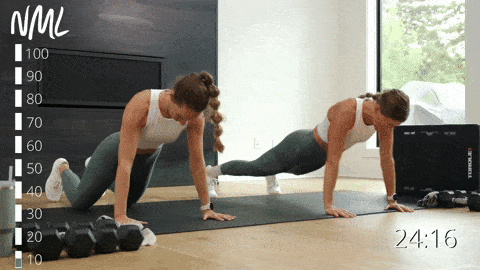
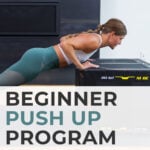
If you’re wondering how to train for push-ups, the key is consistency. You have to put in the reps if you’re going to see results. The best way to learn to do a perfect push-up is to start with a high incline and gradually work your way down. If you’re a beginner, start with wall push-ups to learn proper form and give yourself better leverage. Then move to incline push-ups using a sturdy, elevated surface, like a bench or countertop. Gradually decreasing your incline will help you build more strength while keeping good push-up form. Ultimately, you’ll bridge the gap from incline push-ups to standard push-ups from your toes.
You can also substitute push-ups from your knees if you’re just starting out. That said, if you’re currently doing push-ups from your knees, I do recommend adding an incline if possible. Elevated push-ups give you a greater range of motion, which helps you maintain proper form as your strength builds.
There’s no “right” timeline for this progression. Push-ups are extremely challenging and take a lot of time and reps to master. Some women feel ready to advance in a few weeks, while others might take months. It depends on your starting point, consistency and form. I personally used a 12-week push-up training program, but you can repeat this program as much as needed to get to full push-ups from your toes.
If you’re working on moving from modified push-ups to standard push-ups, focus on quality over quantity. Slow, controlled reps and proper form will get you further than rushing through sets. Common mistakes usually have to do with form. Keep your core engaged, lead with your chest and avoid letting your hips sag. This not only keeps you safe but also ensures that you’re actually strengthening the muscles you need to progress.
I’m often asked about push-up devices – the ones that promise to make push-ups easier or “more effective.” In my experience, you don’t need any of them. Your bodyweight is enough. The best results come from consistency and proper form.
THE YEAR OF THE PUSH-UP
Push-Up Tracker
As a community, we set a goal to complete 10 push-ups a day every day this year. Track your progress and celebrate your consistency with this free PDF push-up tracker!
Download Tracker
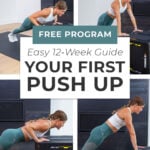
Step-By-Step Push-Up Guide
When I set a goal to master push-ups, I used a specific formula and step-by-step process to improve my form. I found 2 keys to a successful push-up plan for beginners:
Whether you’re a beginner or advanced, one of the first things to do is set realistic expectations. On average, it can take 12 weeks to drop an incline if you’re working on your push-ups. It might take you 6-12 months of consistent push-up work to nail your first push-up from your toes. But when you do, you’ll be so proud of your accomplishment!
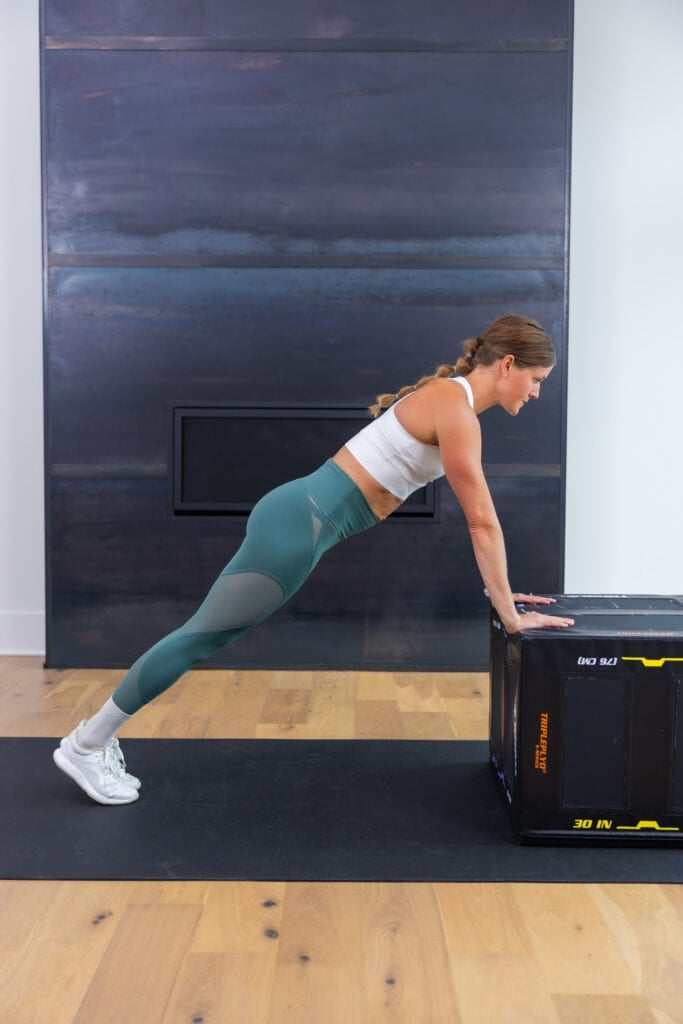
Step 1: Incline Push-Ups
Adding an incline to push ups allows you to pracAdding an incline to push-ups allows you to practice the movement while decreasing the stress on your upper body and core. This will help you maintain proper form as you build strength. Incline push-ups:
- Train your body in a proper push-up position.
- Take your body through a full range of motion.
- Promote better core engagement.
- Provide options to increase or decrease the intensity.
Start with a higher incline that provides enough assistance for you to perform multiple push-ups. Avoid starting at a lower incline that will only allow you to complete 1 rep.
By following the 12-week program outlined below, you’ll work to increase the volume of repetitions you can perform as you gradually find lower surfaces to place your hands on.
Note, the higher the incline, the easier the push-up. You’ll lower or drop the incline as you build strength over time.
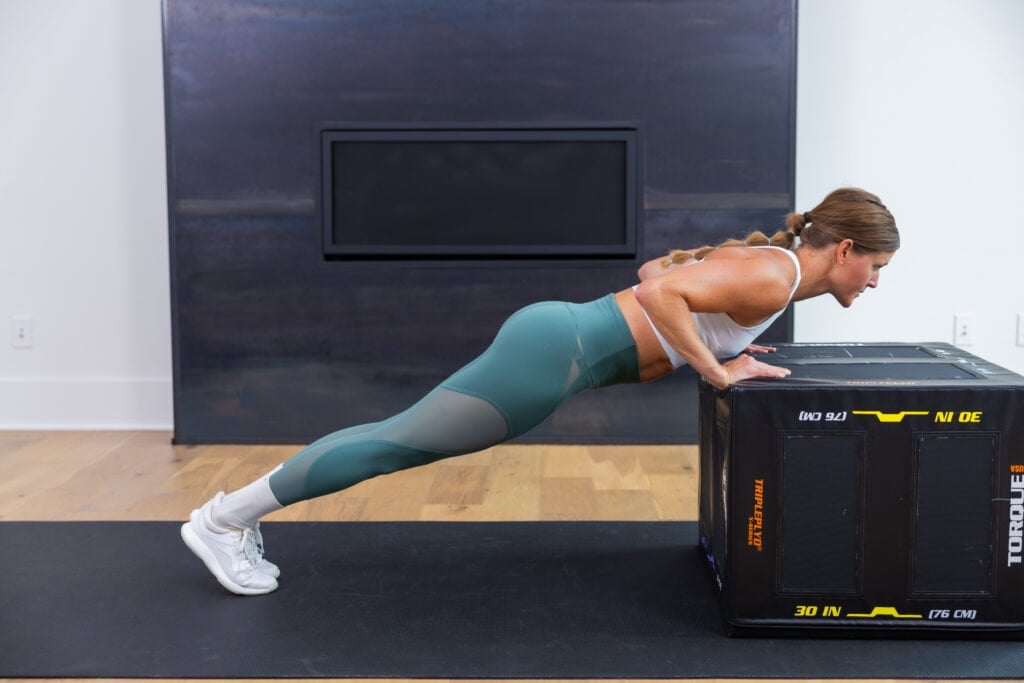
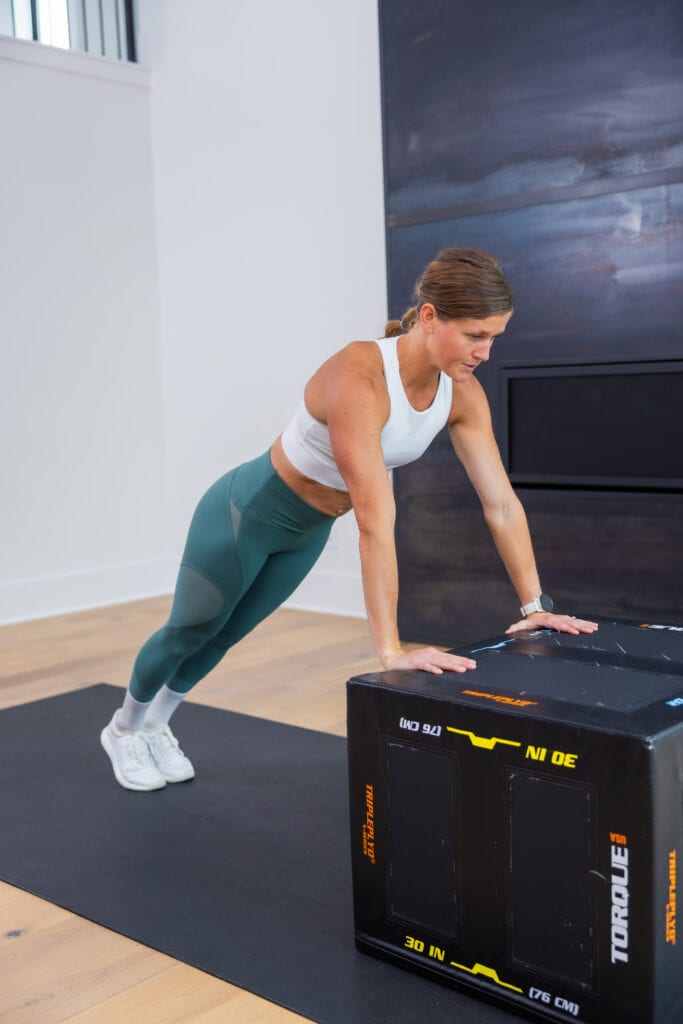
How to Do an Incline Push-Up
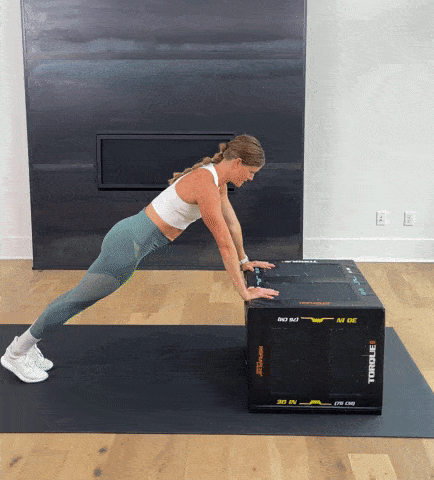
- Stand in front of your bench. The higher the surface, the easier the push-up will be.
- Plant your hands on the bench and step back into a high plank position. Shoulders are stacked over wrists, neutral spine.
- Hold this incline plank position, maintaining a straight line with your body, as you slowly lower your chest towards the bench. Lead with your chest, elbows fall about 6 inches away from your body (not out to the sides).
- Once at the bottom of your push-up, exhale as you push back up into high plank position.
Once you find an incline that allows you to perform 8 repetitions of push-ups for 3 sets, you’re ready to move on to step 2: linear periodization (my comprehensive push-up training program).
Shop My Plyo Box
Achieve your push-up goals faster by using a plyo box for incline push-ups – it’s perfect for safely building upper-body strength, improving form and progressing toward full push-ups from your toes. Use discount code: NML5
Click Here to Shop
Step 2: Linear Periodization
Once you choose an incline level that allows you to complete 8 repetitions of assisted push-ups for 3 sets, you can follow the 12-week push-up program below.
Note that you can always scale the number of repetitions. Start where you are and personalize this formula to fit your needs.
Repeat the 12-week program, lowering the incline after 12 weeks. Continue the pattern until you’re able to complete the program with no incline.
When it comes to mastering push-ups, volume of training is more important than your maximum number of reps. Again, consistency over time is what compounds.
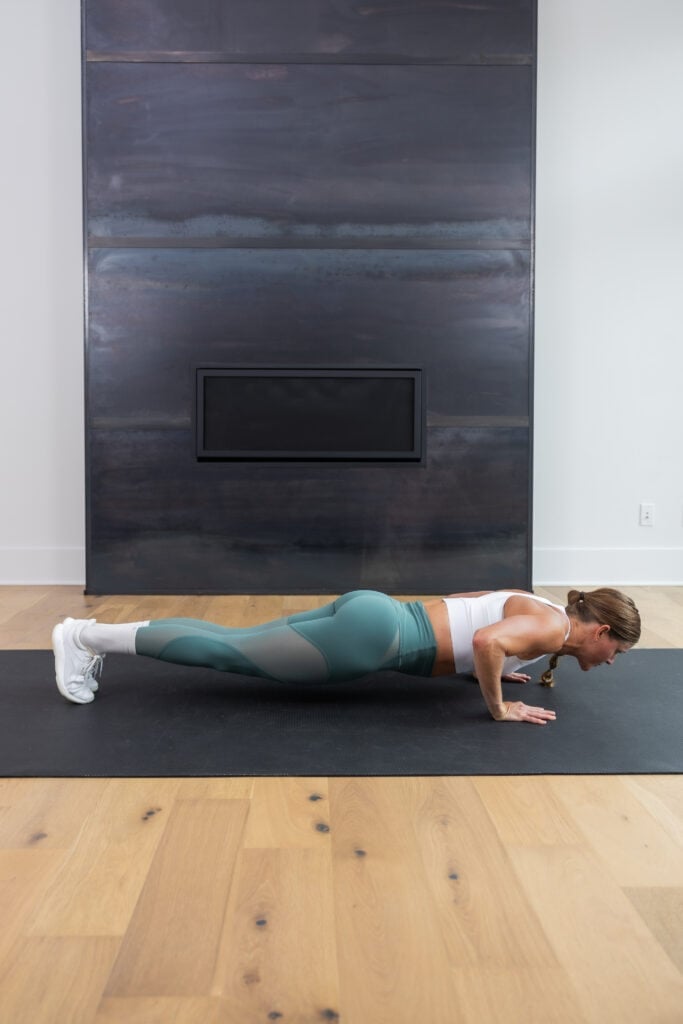
Step 3: Full Push-Ups
Once you’ve repeatedly lowered your incline, you’re ready to try full push-ups from your toes.
Targets: Chest, shoulders, triceps, back, abs and core muscles.
How to Do a Push-Up
- Start in a high plank position with your shoulders stacked over your wrists, weight evenly distributed among all 10 fingers. Pull your kneecaps up towards your belly, feet hip-width apart.
- Hold this plank position, maintaining a straight line with your body, gaze slightly in front of you.
- Slowly lower your chest down towards the ground as your elbows fall back towards your hips (not out to the sides).
- Once at the bottom of your push-up, exhale as you push back up into high plank position, returning to the starting position.
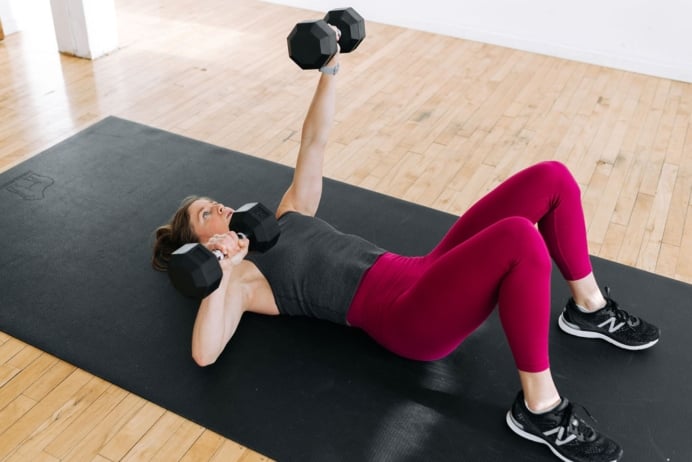
Modification: If holding a high plank causes wrist pain, place your hands on a pair of sturdy dumbbells.
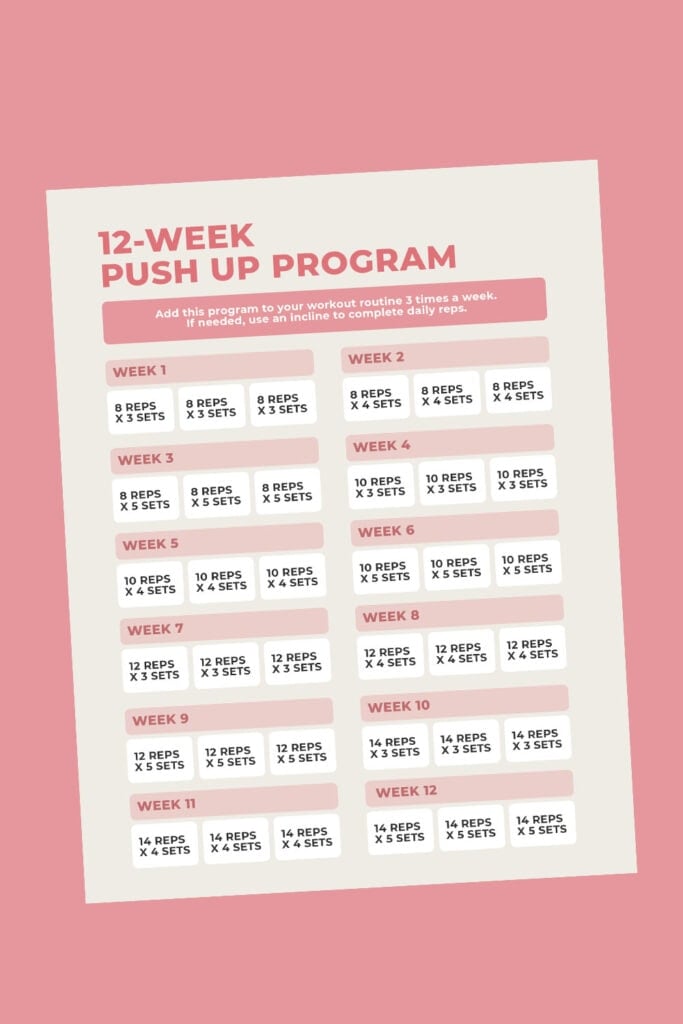
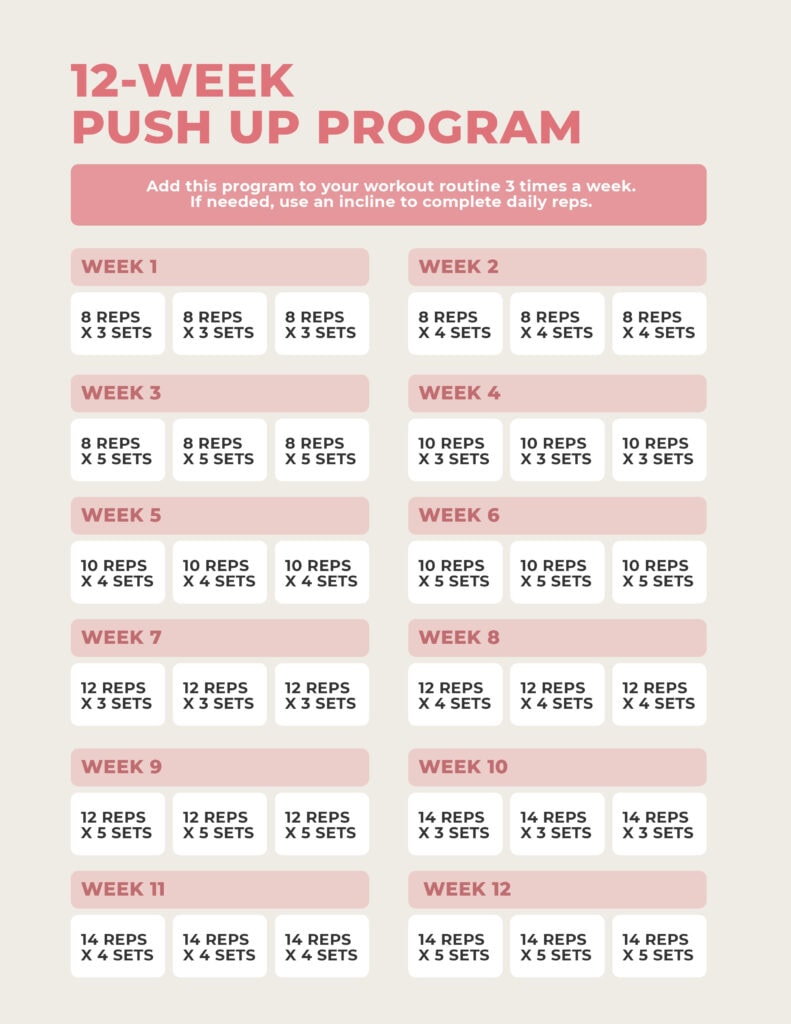
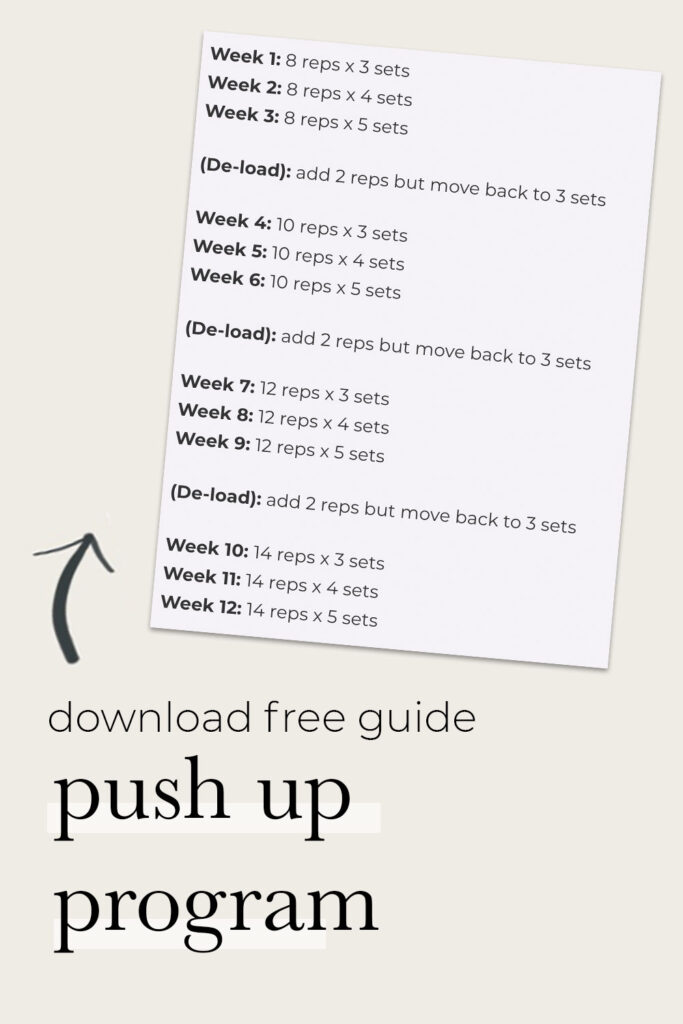
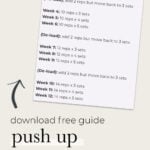
12-Week Program
Add this program to your workout routine 2-3 times each week. If needed, add an incline to complete your daily reps. Once you complete the 12-week program, you should drop the incline and start from Week 1 of the program. Continue the pattern until you’re able to complete the program with no incline.
Week 1: 8 reps x 3 sets
Week 2: 8 reps x 4 sets
Week 3: 8 reps x 5 sets
(De-load): add 2 reps but move back to 3 sets
Week 4: 10 reps x 3 sets
Week 5: 10 reps x 4 sets
Week 6: 10 reps x 5 sets
(De-load): add 2 reps but move back to 3 sets
Week 7: 12 reps x 3 sets
Week 8: 12 reps x 4 sets
Week 9: 12 reps x 5 sets
(De-load): add 2 reps but move back to 3 sets
Week 10: 14 reps x 3 sets
Week 11: 14 reps x 4 sets
Week 12: 14 reps x 5 sets
FAQs
How can I build strength for more advanced push-up variations?
To build strength for advanced push-up variations (like one-arm push-ups), focus on progressive overload and proper form. Start with foundational moves like incline push-ups, negative (eccentric) push-ups and isometric holds to strengthen your chest, shoulders, triceps and core. Gradually lower your incline or add resistance (like a weighted vest or band). Incorporating accessory exercises such as dumbbell chest presses, tricep dips and planks will also help you develop the stability and control needed for advanced moves like diamond push-ups, decline push-ups or single-arm push-ups.
What is the best method to increase push-up and pull-up reps?
The best way to increase your reps is through consistency, gradual progression and focused strength training. For push-ups, use volume training to build endurance. For pull-ups, use band-assisted pull-ups to develop pulling strength, and supplement with back and bicep exercises like rows and lat pulldowns. Track your progress weekly and aim to add 1-2 reps at a time while maintaining good form.
Why are push-ups and pull-ups so hard?
Push-ups and pull-ups are difficult exercises because they challenge large muscle groups and require strong stabilizers and core control. Many people struggle because these movements use your bodyweight as resistance. Pull-ups require significant back and grip strength, while push-ups rely heavily on the chest, shoulders and triceps working together with your core for balance and alignment. When I started training for my first Murph Workout, the push-up and pull-up portions of the challenge were extremely intimidating to me. I worked on them extensively to be able to complete a full Murph Workout (so with consistent training, your body adapts and these exercises are doable).
Will doing 100 push-ups a day build muscle?
Doing 100 push-ups a day can improve muscular endurance and upper-body tone, but it won’t necessarily build significant muscle mass. Muscle growth happens when your muscles are challenged with enough resistance and recovery time. If 100 push-ups feel easy, your body will adapt and stop building strength. To build muscle, focus on progressive overload – adding resistance, slowing tempo or mixing in different variations – and pair your training with proper nutrition and rest.
You Can Do This!
When I started strength training, I couldn’t do a single push-up from my toes – but with consistency and patience, that changed. Push-ups aren’t just about building upper-body strength; they’re about developing total-body control, confidence and resilience. Every rep you work toward shows dedication and progress.
Remember, there’s no perfect timeline. Your strength builds one push-up at a time. Stay patient, stay consistent and celebrate each step forward. If I can do it, you can too.
Free 2-Week Strength Program
More Workouts
Upper Body WorkoutsPin This 12-Week Push-Up Progression Program
This post includes affiliate links. I do earn a commission for products purchased using these links (at no additional cost to you). Thank you for supporting Nourish Move Love, making the content you see on this blog possible.
6 comments

Hi! Do you recommend a certain rest time between sets? Or is it subjective- as long a rest time as needed to be able to complete each set of reps? I’m working on your 12 week challenge now and trying to figure out exactly how to work it into the workouts! Thanks so much!
Hi Cassidy! Great question – I’d recommend resting about 30-60 seconds between sets. This is generally short enough to keep things challenging, but long enough that you should be able to maintain good form for each set. If you need a bit of a longer to maintain good form while knocking out those reps, that’s totally fine. I’d try to add some dedicated push-up work to your training 2-3 times per week (adding these sets to full-body days and arm days if you can!). Keep up the great work! -Lindsey
Hello,
I am 66 years young and want to strengthen my upper body by doing your 12 week push up challenge. I was wondering what ‘de-load’ means? I just finished week one with 3 days this week at counter height. It feels good so far, can’t wait to keep reducing the incline and see how it goes.
Thanks for all the encouragement!
Chris
So awesome to hear, Christine! “De-load” just refers to dropping back to fewer sets. So when you start week 4, increase to 10 reps but drop back down to 3 sets. (Rather than doing the 5 sets you did in week 3.) Keep up the great work! -Lindsey
Hi Lindsey! What exercises complement the push up if I want to make a workout with this pull up progression? You are the best, btw. I absolutely love your workouts. I have lupus, and many weeks I can only do a 15 minute workout a couple of times a week. But I can hand pick what kind of workout I want and it is always so encouraging. Thank you for all the hard work you put in. You help me keep on in my health journey regardless of the challenges! I also love that you are a believer, and I know that your focus is on the Lord. I recommend your workouts to all the ladies I know!
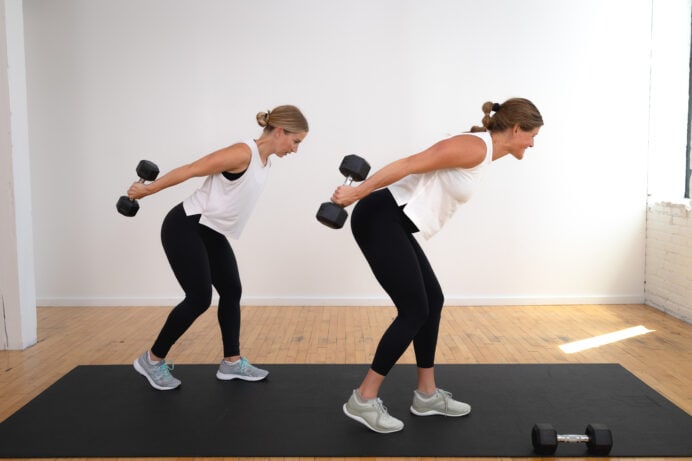
Hi Kelly Jo! Thank you so much for your kind words — that means a lot. I’m so glad the workouts have been encouraging for you! To complement your push-up progression, try adding rows (with dumbbells or bands), planks, and shoulder presses to strengthen your back and shoulders, plus some core work like dead bugs or bird dogs for balance. Keep listening to your body and honoring where you are — you’re doing amazing! – Lindsey