


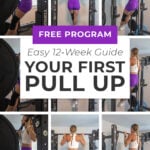
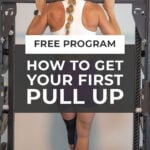
How to Get Better at Pull-Ups
This free 12-week pull-up program is designed to take you from beginner progressions to your first unassisted pull-up using the same approach that helped me achieve my first strict pull-up. It’s ideal for anyone who wants to build functional upper-body strength, improve posture and shoulder stability and develop the full-body control that pull-ups require. If you stay consistent, this plan will give you the structure, confidence and progression you need to finally achieve an unassisted pull-up.
Quick Links:
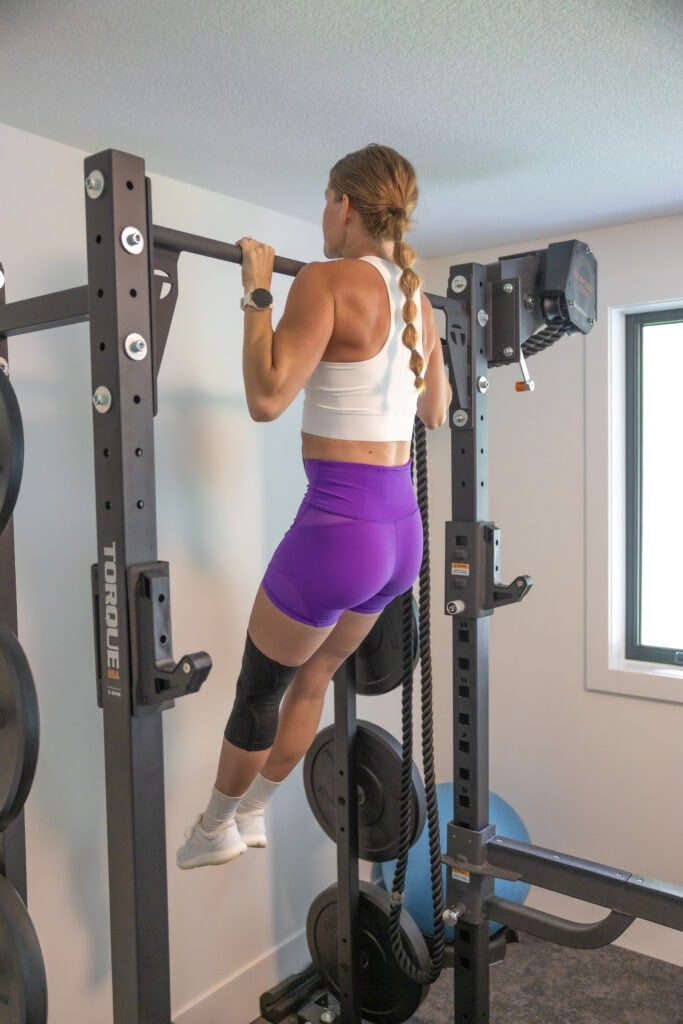
Achieving my first pull-up completely transformed the way I felt about my strength. I trained them off and on, but got pretty serious about them after my knee surgery. When I first started, I couldn’t lift myself over the bar. Over time, they’ve become one of my favorite exercises to include in my strength training routine. Pull-ups are one of the most humbling exercises you can do, and honestly, they’re a little intimidating. But over time – and with consistent, structured practice – I used the exact 12-week plan I’m sharing here to go from 0 pull-ups to eventually completing the 100 pull-ups included in a Murph Workout.
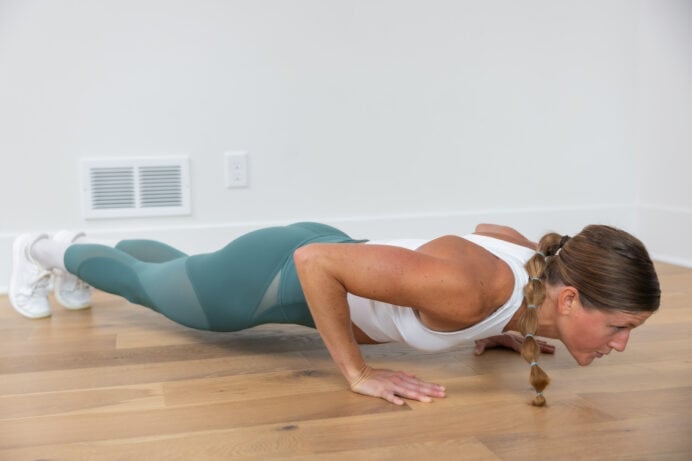
Pull-ups demand real functional strength. They don’t just work the back muscles and biceps; they challenge the shoulders, forearms, chest and deep core muscles in a way that carries over into everyday life. I noticed improvements in my posture, my ability to lift and carry heavy things, my shoulder stability and even the way I moved through other workouts. The full-body coordination that strict pull-ups require made almost every other upper-body exercise feel stronger and more controlled.
In the beginning, what helped me the most was breaking the pull-up down into smaller, manageable steps. Instead of trying to do full reps before I was ready, I learned to build the foundation first. Dead hangs taught me how to develop grip strength. Scapular pull-ups helped me understand how to engage my lats properly. Assisted pull-up variations allowed me to practice the movement pattern without overloading my shoulders. I paired these with rows to strengthen the same muscles in a more accessible position. Over time, these arm exercises came together to help me complete full unassisted pull-ups and chin-ups.
Training pull-ups a few times per week made the biggest difference for me. I needed enough frequency to get stronger but enough rest so my shoulders and grip strength didn’t burn out. When I was still working toward that first rep, I focused on controlled, low-rep sets (usually 3-5 sets of 3-6 reps). The quality of the movement matters so much more than the quantity.
I learned early on that building pure strength had to come before endurance. There’s no shortcut to strength – especially when it comes to lifting your own bodyweight. Once I could perform a few clean, strict pull-ups, I shifted toward building volume and higher-rep sets. That’s ultimately how I worked up to the longer sessions that helped me reach 100 reps.
Pull-up form became the non-negotiable part of my training. If I wasn’t engaging the right muscles (especially the lats and core), I wasn’t getting closer to my goal. Slowing everything down and paying attention to how my body
moved not only helped me progress faster, but also kept my shoulders healthy and prevented the bad habits that often lead to injury.
This 12-week pull-up plan reflects the exact approach I used. It’s built on steady progression. If you stay consistent and give yourself time to adapt, you’ll be surprised by how quickly your strength builds.
Step-By-Step Pull-Up Guide
When I set a goal to master pull-ups, I used a specific formula and step-by-step process to improve my form and get from 0 to 100 pull-ups. I found 3 keys to a successful pull-up program:
- Step 1: Hanging On The Pull-Up Bar
- Step 2: Resistance Band (Assisted) Pull-Ups
- Step 3: Linear Periodization (Program to Increase Repetition)
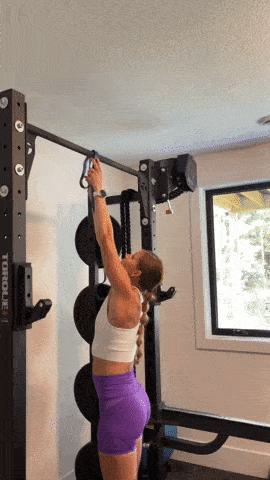
Step 1: Hang On the Bar
The bottom of the pull-up is the most difficult portion of the move for most people, so the first step in mastering the pull-up is hanging on the bar (performing a dead hang). This step is crucial because you need to mimic the move you want to do. Hanging from the bar can strengthen the muscles that retract the scapula together, which will help you avoid getting stuck at the bottom of your pull-up.
Hanging on the bar has other benefits:
- Improves grip strength
- Spinal decompression
- Stretches the upper body
- Improves shoulder mobility and reduces shoulder pain
- Improves posture
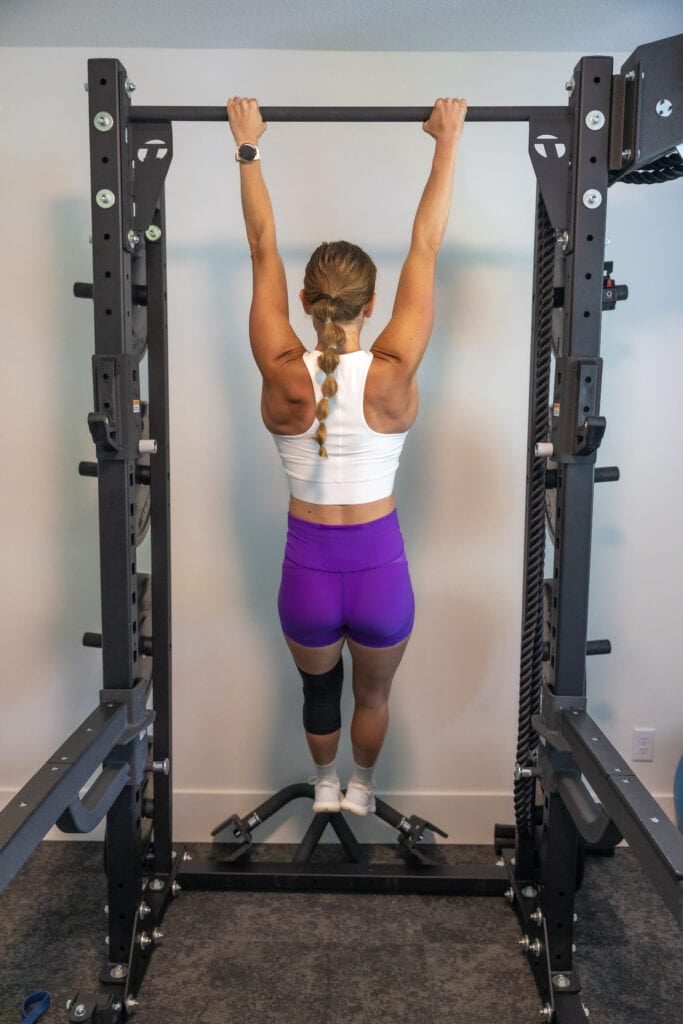
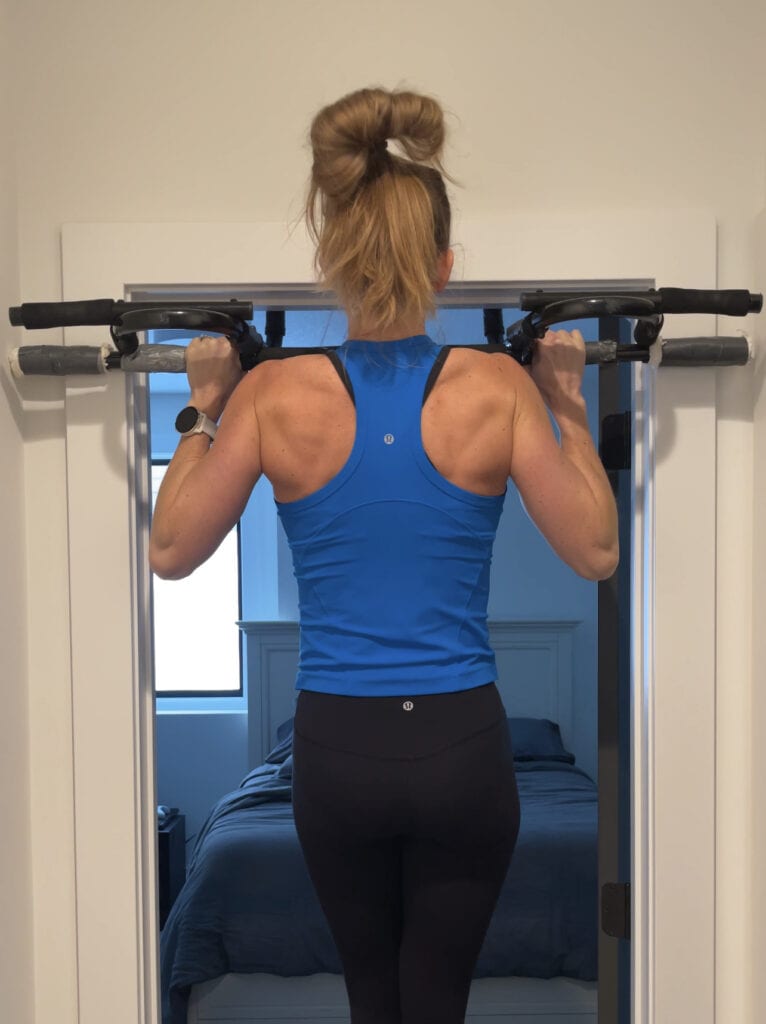
How to Hang on a Pull-Up Bar
- Find a Suitable Pull-Up Bar: Use a secure pull-up bar that can support your bodyweight.
- Stand Beneath the Bar: Position yourself directly beneath the pull-up bar with your feet flat on the ground.
- Grip the Bar: Reach up and grab the bar slightly wider than shoulder-width distance apart (overhand or wide grip). Your palms should face away from your body.
- Hang Freely: Allow your body to hang freely from the bar with your arms fully extended. Your body should form a straight line from your head to your heels.
- Engage Your Core: As you hang, engage your core muscles to stabilize your body. This will help you maintain good posture and control while hanging from the bar.
- Breathe and Hold: Focus on relaxing your grip and maintaining a steady breath. This will help you build endurance for longer hangs.
- Repeat and Progress: Follow the progression program below to increase the time you can hang on the bar.
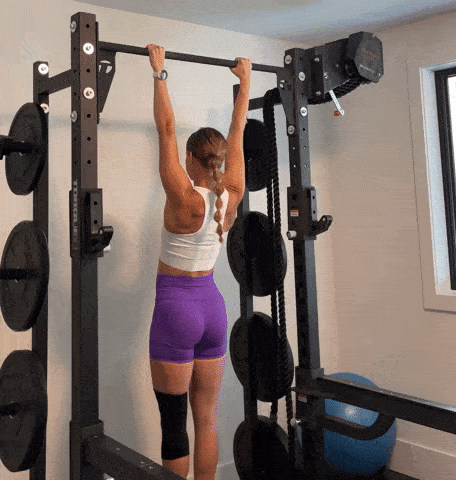
Step 2: Resistance Band Pull-Ups
Adding resistance bands to your pull-up routine lets you practice the full movement with less load, helping you maintain proper form as you build strength. Start with a band that gives enough assistance for multiple reps, rather than a lighter band that limits you to one. The 12-week program below gradually increases your rep volume while decreasing the assistance you need.
Pull-ups primarily target the upper and lower back, the latissimus dorsi (lats), erector spinae, trapezius (traps), rear deltoids, biceps, pectoralis major and minor (chest) and core.
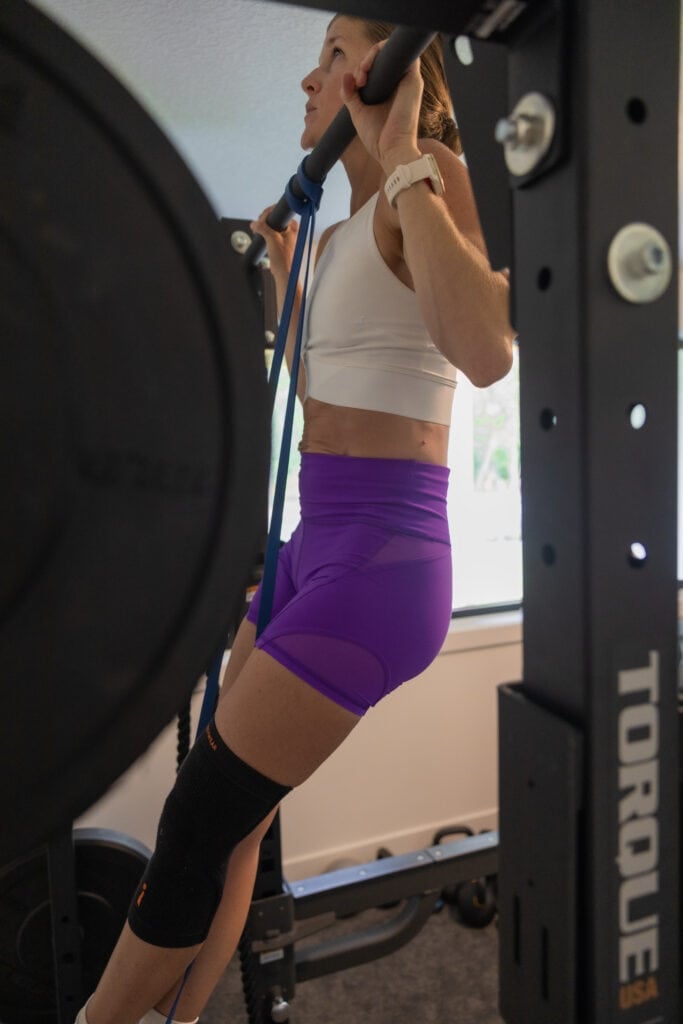
How to Do Assisted Pull-Ups With a Resistance Band
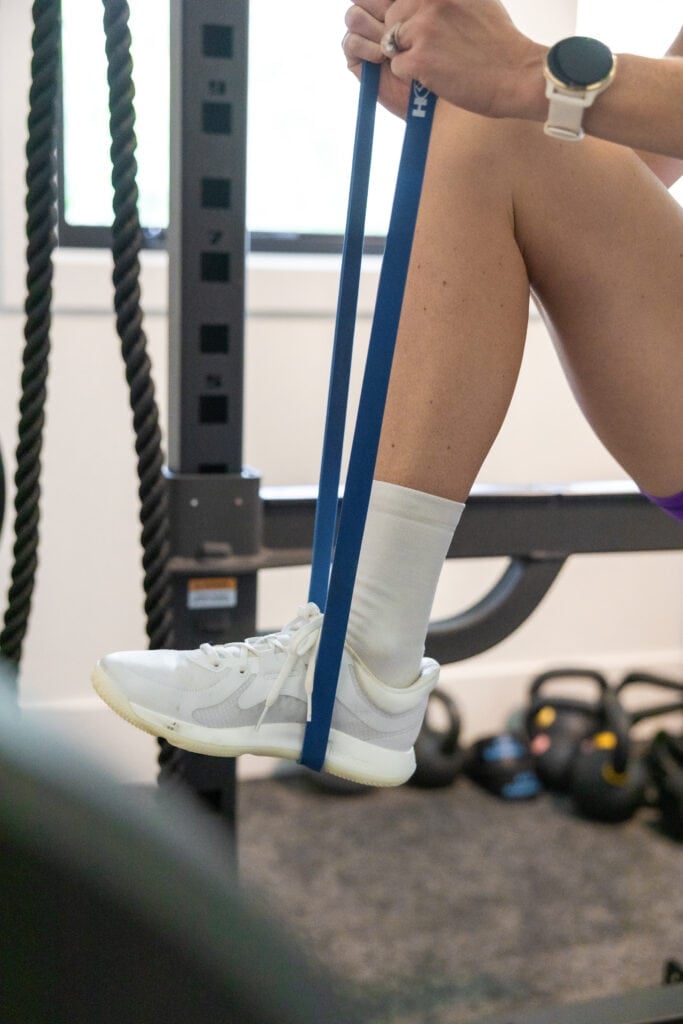
- Choose the Right Assistance: Select a long loop resistance band that matches your current fitness level. Thicker (heavier) bands provide more assistance, while thinner (lighter) bands provide less assistance. Beginners who need more assistance should start with a heavier band (note that you may need to use more than one band if you’re just starting out).
- Set Up the Pull-Up Bar: Ensure the pull-up bar is securely installed and can support your weight.
- Attach the Band to the Pull-Up Bar: Loop one end of the long loop resistance band over the pull-up bar, ensuring it’s secure.
- Step Into the Band: Stand underneath the pull-up bar, and place one foot through the loop formed by the resistance band. Position the band under your knee or foot, depending on the band’s length and your preference.
- Grip the Bar: Reach up and grip the pull-up bar with your palms facing away from your body (overhand grip), hands slightly wider than shoulder-width distance apart. An underhand grip will target the biceps more than back strength.
- Hang From the Bar: Allow your body to hang freely with your arms fully extended.
- Perform the Pull-Up: Initiate the pull-up by squeezing your shoulder blades together and pulling your chest towards the bar. Keep your elbows pointed downward throughout the movement.
- Complete the Pull-Up: Continue to pull your body, pulling your chest up until your chin is above the bar, or as high as you can comfortably go. The range of motion will be different for everyone. Keep your core engaged and your body straight throughout the movement.
- Lower Yourself Down: Slowly lower yourself back down to the starting position, extending your arms fully.
Once you find a band that allows you to perform 5 repetitions of assisted pull-ups for 3 sets, you’re ready to move on to step 3: linear periodization (comprehensive pull-up training program with PDF).
Shop My Resistance Bands
These are the pull-up assistance bands I use to progress to unassisted pull-ups.
Use discount code: NML
Click Here To Shop
Use discount code: NML
Step 3: Linear Periodization
Once you choose a pull-up assist band that allows you to complete 5 repetitions of assisted pull-ups for 3 sets, you can follow the 12-week pull-up program below.
Note that you can always scale the number of repetitions. For example, start with 2-3 reps for 3 sets. Start where you are and personalize this formula to fit your needs.
When it comes to mastering pull-ups, volume of training is more important than your maximum number of reps. Again, consistency over time is what compounds.
Program Progression
Add hanging on the pull-up bar to your workout 2-3 times a week. Start with a 10-second bar hang and progress with the following:
- 10-second bar hang x3 sets
- 20-second bar hang x3 sets
- 30-second bar hang x3 sets
- 40-second bar hang x3 sets
Once you can complete a 40-second hang for 3 sets, you’re ready to progress to banded pull-ups.
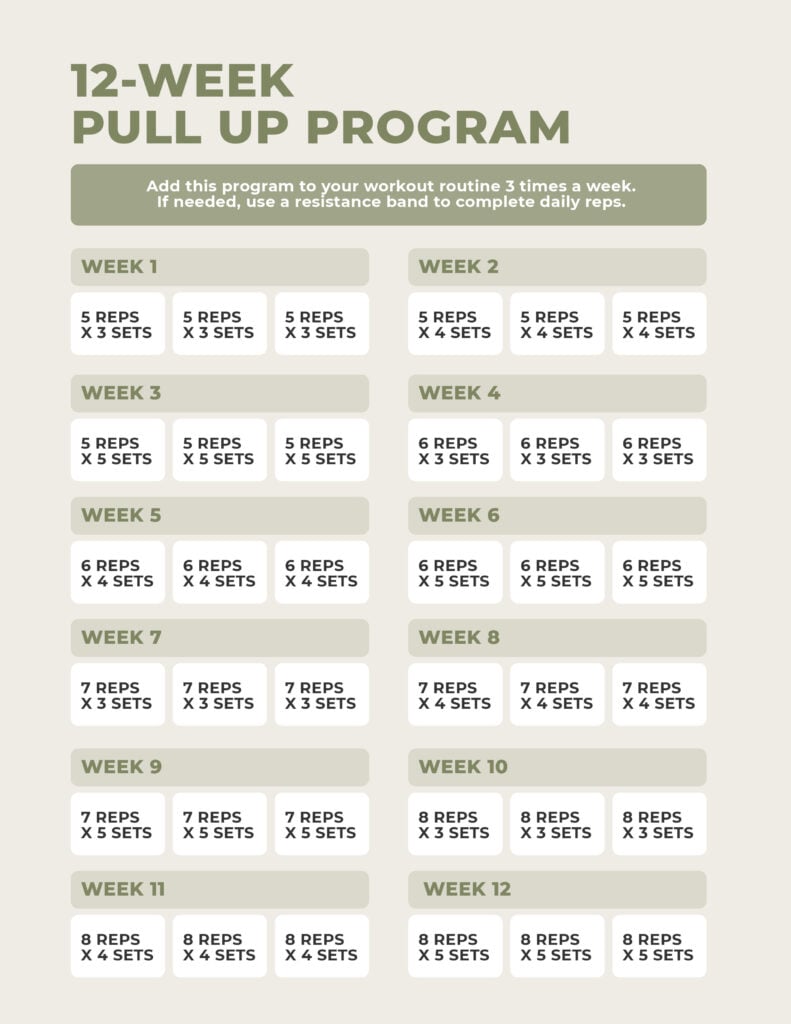
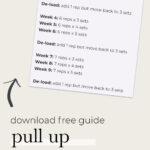
Full 12-Week Pull-Up Program
Add this program to your workout routine 2-3 times each week. This is a sample, but you can start at 2 or 3 reps if needed, rather than 5. Just follow the same formula by adding 1 rep to your base at each de-load.
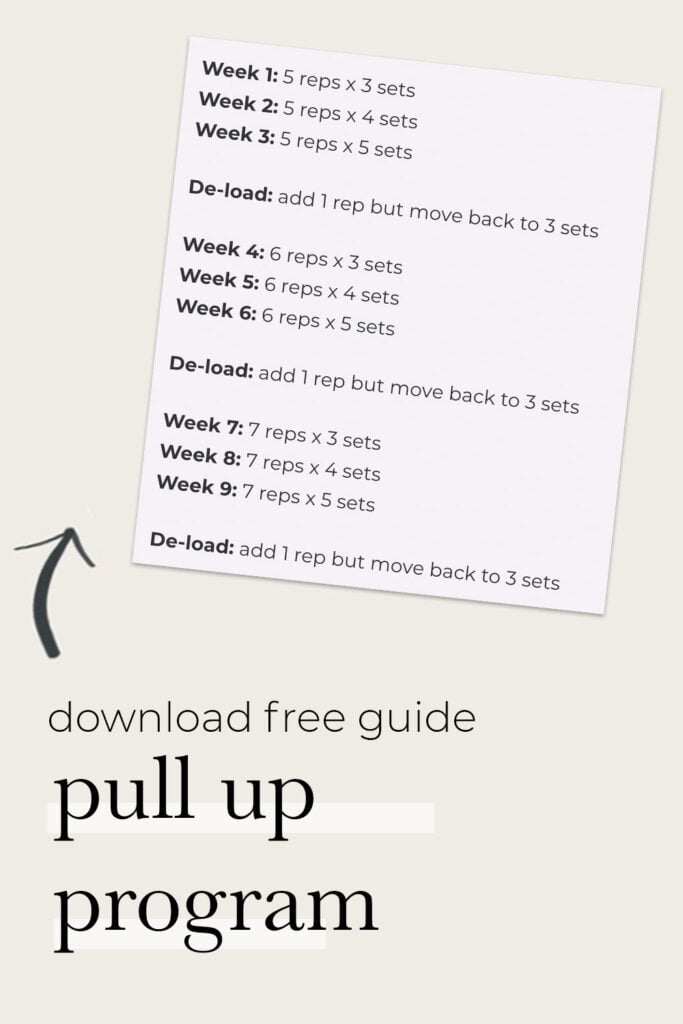
Week 1: 5 reps x 3 sets
Week 2: 5 reps x 4 sets
Week 3: 5 reps x 5 sets
De-load: add 1 rep but move back to 3 sets
Week 4: 6 reps x 3 sets
Week 5: 6 reps x 4 sets
Week 6: 6 reps x 5 sets
De-load: add 1 rep but move back to 3 sets
Week 7: 7 reps x 3 sets
Week 8: 7 reps x 4 sets
Week 9: 7 reps x 5 sets
De-load: add 1 rep but move back to 3 sets
Week 10: 8 reps x 3 sets
Week 11: 8 reps x 4 sets
Week 12: 8 reps x 5 sets
Once you complete the 12-week program, you should drop a band size and restart the program. Continue the pattern until you’re able to complete the program with no assistance.
LET’S GET STARTED
Download This FREE Pull Up Program
Download the PDF calendar for this pull-up progression program to easily track your progress over time.
Download Plan
FAQs
How do I build strength to do pull-ups?
When I started training to complete my first Murph Challenge, the pull-up portion of the workout intimidated me the most. I recommend that you focus on foundational movements first: dead hangs, scapular pull-ups, negative pull-ups and assisted variations. You can also use a pull-up machine for an assist. These teach correct lat engagement, proper pull-up form and improve your grip strength, which will help you get your first unassisted rep. Consistent practice a few times per week and slow, controlled reps make the biggest difference.
Why am I so weak at pull-ups?
Most people struggle with pull-ups because they lack grip strength, lat activation or the core stability needed to keep the body tight during the movement. It’s definitely not a sign of overall weakness; it’s just a skill you haven’t trained yet! Once you start strengthening those specific areas, progress happens quickly.
What exercises can help improve my pull-up strength?
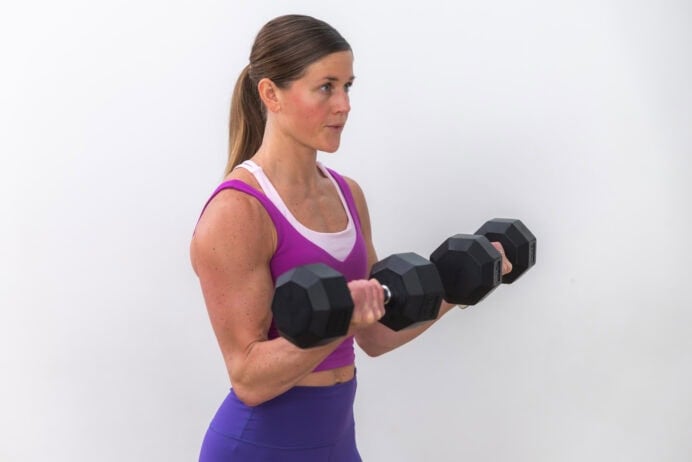
The most effective arm exercises to improve pull-up strength include dead hangs, scapular pull-ups, band-assisted pull-ups, negative reps, inverted rows, lat pulldowns and dumbbell rows. These movements target the lats, upper back and grip strength.
How can I train for pull-ups and progress to a muscle-up?
A muscle-up is basically an advanced pull-up that requires you to pull yourself up explosively over a bar, finishing with a tricep dip. It’s tougher than a regular pull-up because you need both serious pulling power and the ability to smoothly shift into a pushing movement – good form is crucial. To advance from standard pull-ups to muscle-ups, focus on strict pull-up strength, aiming to get your chest to the bar. Then, add explosive pulling work and work on dip strength. Building strength will give you a solid foundation, but keep in mind that this is an explosive exercise that will require power and technique as well.
Your 12-Week Journey to a Stronger You
No matter where you’re starting from, this 12-week pull-up training plan for women is designed to help you build real, functional strength and confidence. Follow the progressions, stay consistent and give your body the time it needs to adapt. By the end of these 12 weeks, whether you hit 1 rep, 10 reps or more, you’ll be a stronger, more capable version of yourself. Your progress is proof of what you’re capable of – pull-ups are challenging, but you can achieve them with consistent practice and effort!
More Posts
Fitness EducationPin This: 12-Week Guide to Improve Your Pull-Ups
This post includes affiliate links. I do earn a commission for products purchased using these links (at no additional cost to you). Thank you for supporting Nourish Move Love, making the content you see on this blog possible.
2 comments


What grip tape do you have on your pullup bar?
Hi Jane! My doorframe pull-up bar has grips on the handles, so I don’t use tape. If you need tape, any grip tape should work just fine. -Lindsey