





12 Lower Body Mobility Exercises for Functional Fitness
These 12 lower body mobility exercises are designed to improve range of motion, movement quality and functional strength. Targeting the hips, knees, ankles and lower body muscles, this roundup includes dynamic stretches, mobility drills and controlled movements that can help you move more comfortably in and out of your workouts.
As a personal trainer, I know how easy it is to skip mobility work when you’re short on time. But a few intentional minutes of lower-body stretching can help you move through simple, everyday activities like climbing stairs and picking things up from the floor with a lot more ease.
I like adding mobility exercises to my warm-ups before lower-body strength workouts because they prep my muscles for the movements ahead and support joint health. They’re also a great option on their own when I feel stiff from sitting, traveling, or simply need to move my body through a longer lower-body stretch.
A Quick Rundown
This roundup includes 12 lower body mobility exercises that target the knees, hips and ankles. You can add a few to your warm-up, use them between strength training sets or complete the full series as a short, standalone mobility session to boost functional movement.
I recommend incorporating mobility work 2-3 times per week, adjusting based on your workout routine and how your body feels. If you have an existing injury, joint pain or medical condition that affects your mobility, talk to your healthcare professional before starting these exercises.
Instructions
Equipment Needed: None. A yoga block or folded towel can be helpful for modifications or additional support during certain movements, but it is completely optional.
Your workout looks like this:
- Beginners: 1-2 sets of 20-30 seconds per stretch
- Intermediate: 2-3 sets of 30-45 seconds per stretch
- Advanced: 3-4 sets of 45-60 seconds per stretch
Focus on controlled movement, proper alignment and breathing throughout. Rest for 15-30 seconds between stretches.
Lower Body Mobility Exercises Outline
1. Forward Fold
Targets: Hamstrings, calves, hips and lower back.
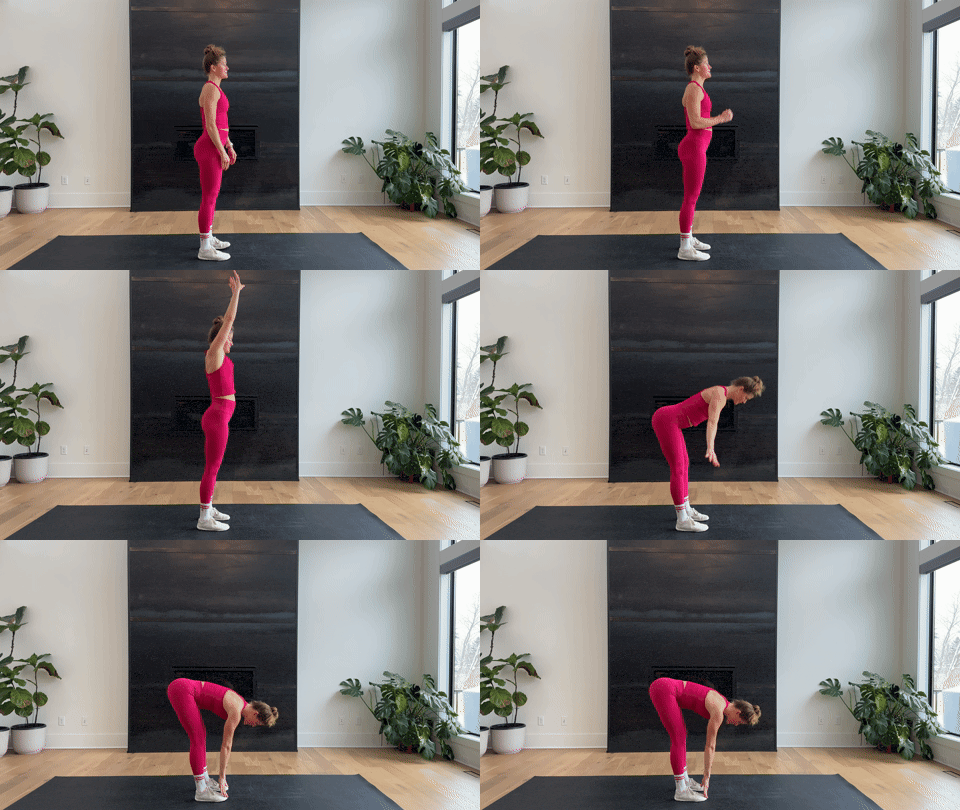
How to Do a Forward Fold
- Start standing with your feet hip-width apart and your toes pointing forward.
- Soften your knees and hinge at your hips, pushing your hips back as you slowly fold your upper body toward the floor.
- Allow your arms to hang toward the floor, reaching your hands toward your shins, ankles or the mat.
- Keep your weight balanced between your heels and the balls of your feet. Avoid rounding or forcing your spine to reach farther.
- Hold the stretch for 20-30 seconds, breathing slowly and allowing your hamstrings to relax with each breath.
Modification(s): Bend your knees more deeply to reduce tension in your hamstrings and lower back. Rest your hands on your shins or a yoga block if reaching the floor is uncomfortable.
2. Hamstring Stretch (Pyramid Pose)
Targets: Hamstrings, low back, spine and hips.
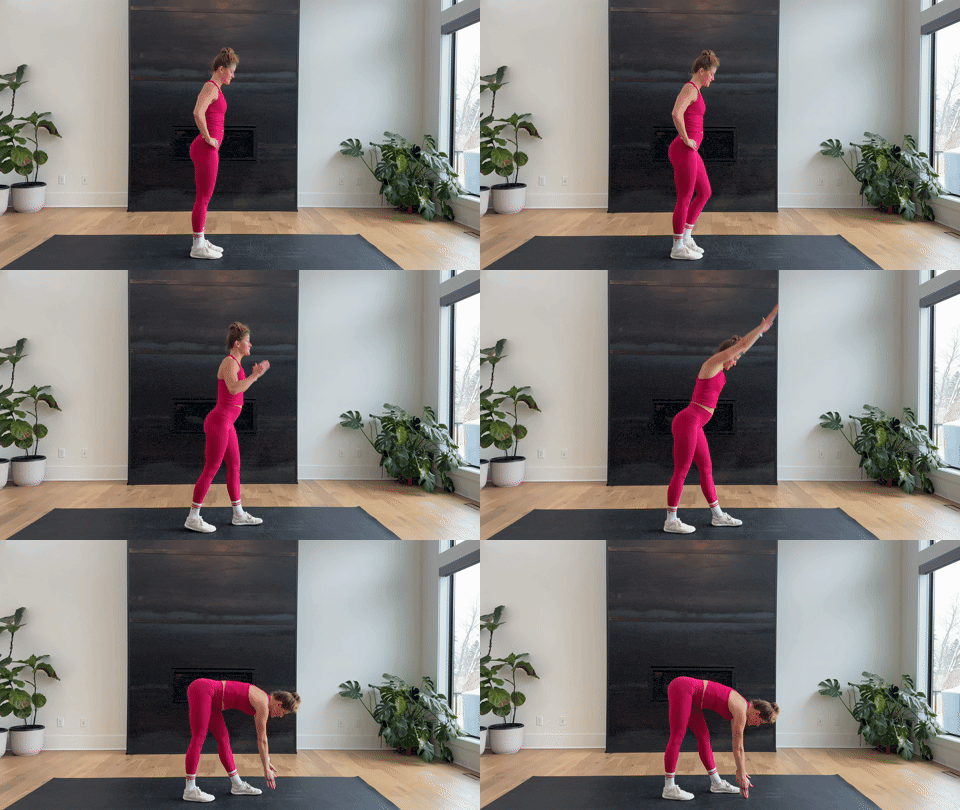
How to Do a Hamstring Stretch (Pyramid Pose)
- Step your right foot forward and your left foot back, creating a comfortable staggered stance. Keep both feet pointing forward.
- Keep most of your weight centered between both legs as you straighten through your front leg. Keep a small bend in your front knee rather than locking it.
- Slowly tip your torso forward from your hips, bringing your hands toward your front leg or the floor.
- Keep your spine long and your hips lifted as you settle into the stretch. You should feel the most tension through the back of your front thigh.
- Hold for 30-60 seconds, then slowly come back to standing and repeat on the other side.
3. Quad Stretch
Targets: Quadriceps, hip flexors and hips.

How to Do a Quad Stretch
- Stand upright with your feet about hip-width apart and engage your core to help with balance.
- Shift your weight onto your left foot and bend your right knee, bringing your right foot behind you.
- Reach your right hand back and hold your ankle or the top of your foot.
- Draw your right heel gently toward your glutes while keeping your knees close and your hips facing forward.
- Maintain an upright posture without letting your lower back arch. You should feel the stretch along the front of your right thigh.
- Release your foot with control, return to your starting position and repeat on the opposite side.
Modification(s): Hold onto a wall, chair or other sturdy surface with your free hand for balance. If you cannot comfortably reach your foot, use a strap around your ankle to extend your reach.
4. Clamshell
Targets: Gluteus medius, gluteus minimus and hip abductors.
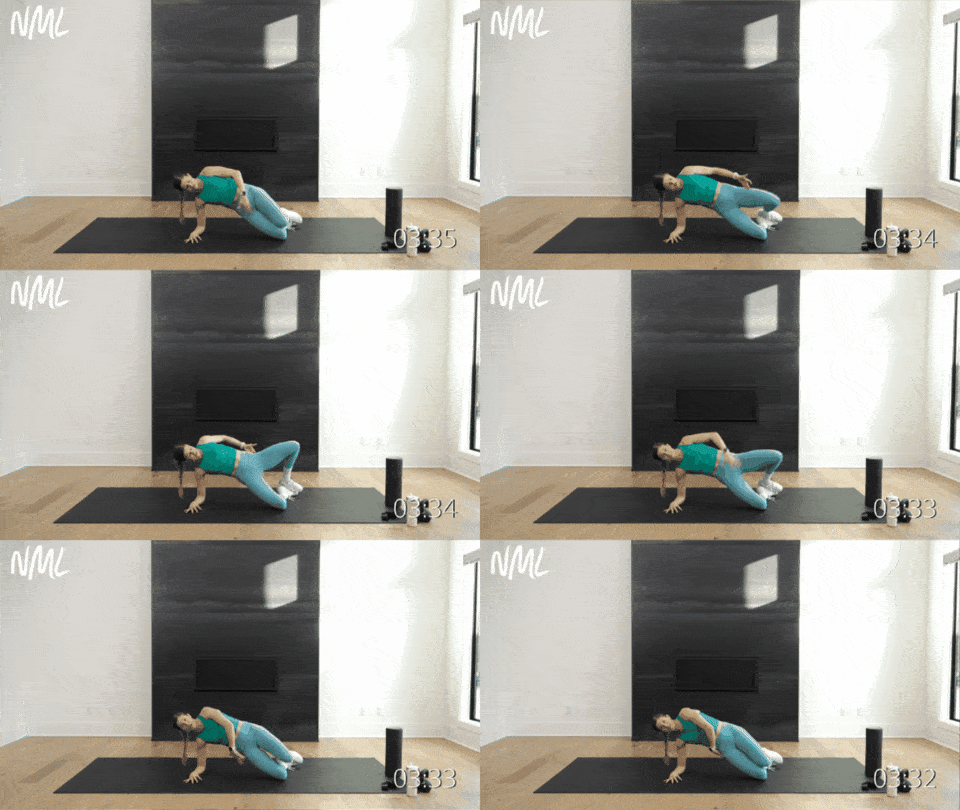
How to Do a Clamshell
- Start laying on your left side, legs stacked and knees bent at a 45-degree angle, feet together. Rest your left forearm on the mat.
- Press through your forearm to lift your hips, finding a modified side plank position. Shoulders are stacked over left elbow, core engaged. Hold this position.
- Keeping your feet touching, squeeze your outer glutes to open your top right knee, mimicking a clamshell opening.
- Slowly and with control, reverse the movement, bringing your right knee to touch the left knee, returning to the starting position.
Modification(s): For an added challenge, add resistance bands. Place one just above your knees. Keep your feet together and maintain tension on the band as you lift your top knee. Reduce the range of motion if needed to keep your hips stable.
5. Kneeling Hip Flexor Stretch
Targets: Hip flexors, hips, groin, quads, glutes, lower back and core.
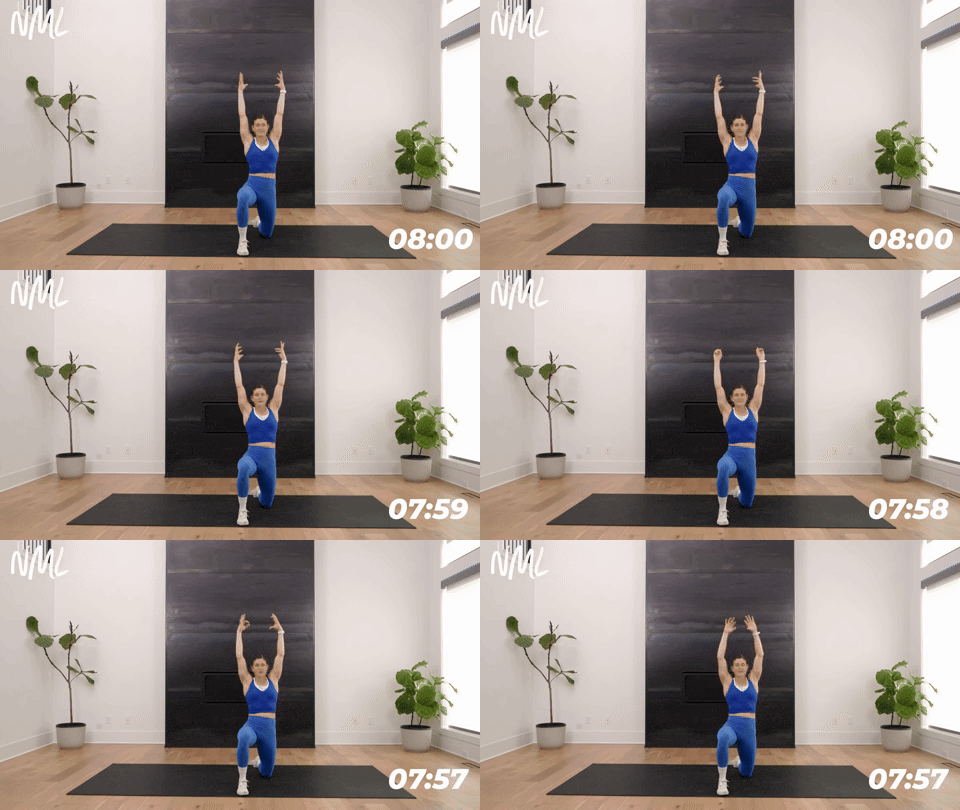
How to Do a Kneeling Hip Flexor Stretch
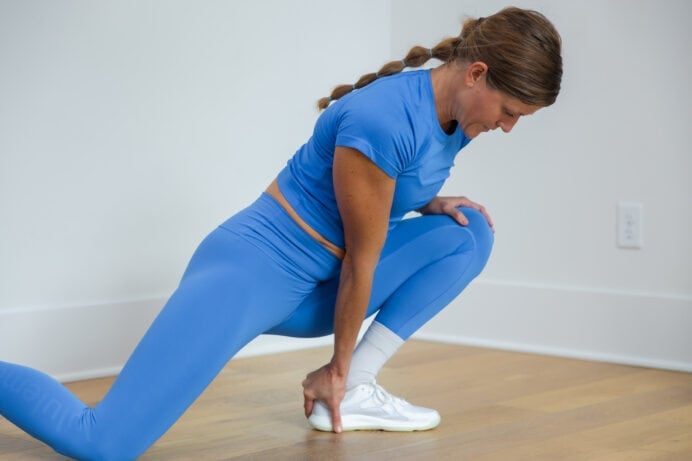
- Start in a half-kneeling position with your right foot planted in front of you and your left knee resting on the floor behind you. Tuck your back toes under.
- Position your front knee directly over your ankle and stack your back knee beneath your hip.
- Gently tuck your pelvis under and squeeze your glutes to create a slight forward shift through your hips. Keep your torso upright rather than leaning forward.
- Hold this position for up to 40 seconds, breathing slowly as you settle into the stretch.
- Optional: For a deeper variation, lift your back knee off the floor while keeping your hips tucked and glutes engaged.
- Switch sides and repeat with your left foot forward.
Modification(s): Keep your back knee on the floor and place a folded towel underneath for cushioning.
6. Seated Figure Four
Targets: Glutes, hips and piriformis.
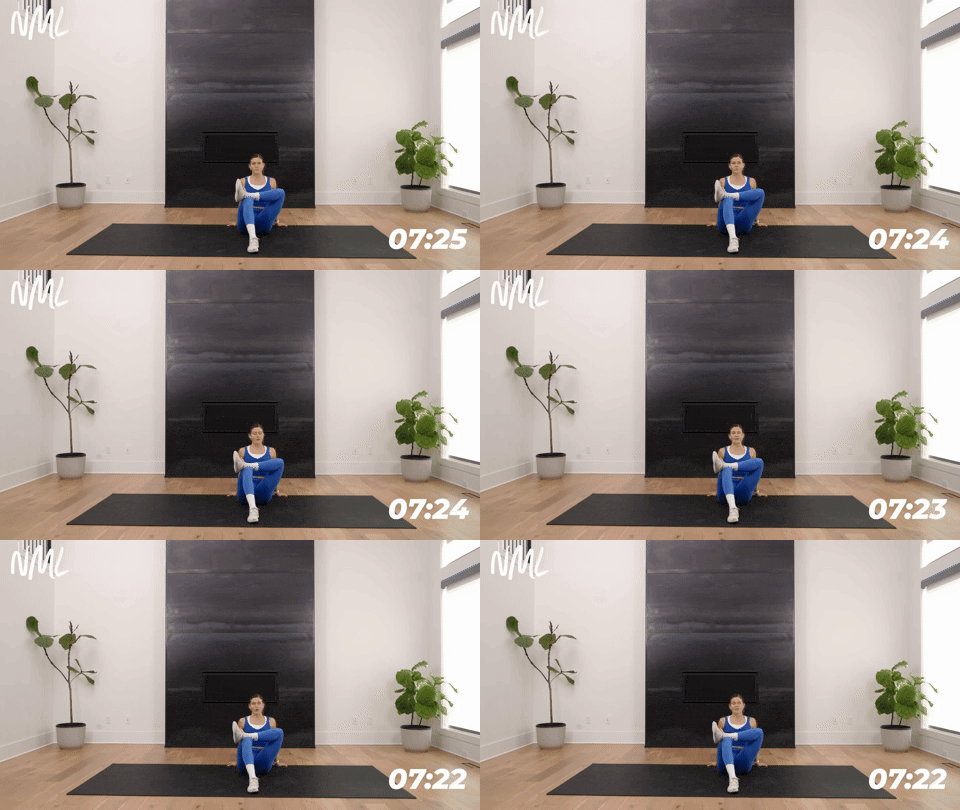
How to Do a Seated Figure Four
- Sit upright with both legs extended in front of you and your hands resting beside your hips.
- Bend your right knee and bring your right ankle across your left thigh, creating a figure ”4” shape with your legs.
- Bend your left knee and bring your left foot closer to your body, keeping it planted on the floor.
- Sit tall and gently lean your torso forward, keeping your back long as you deepen the stretch through your right outer hip and glute.
- Hold the stretch while taking slow, controlled breaths, then switch sides and repeat.
7. Butterfly Stretch
Targets: Inner thighs, upper back, hips and groin.
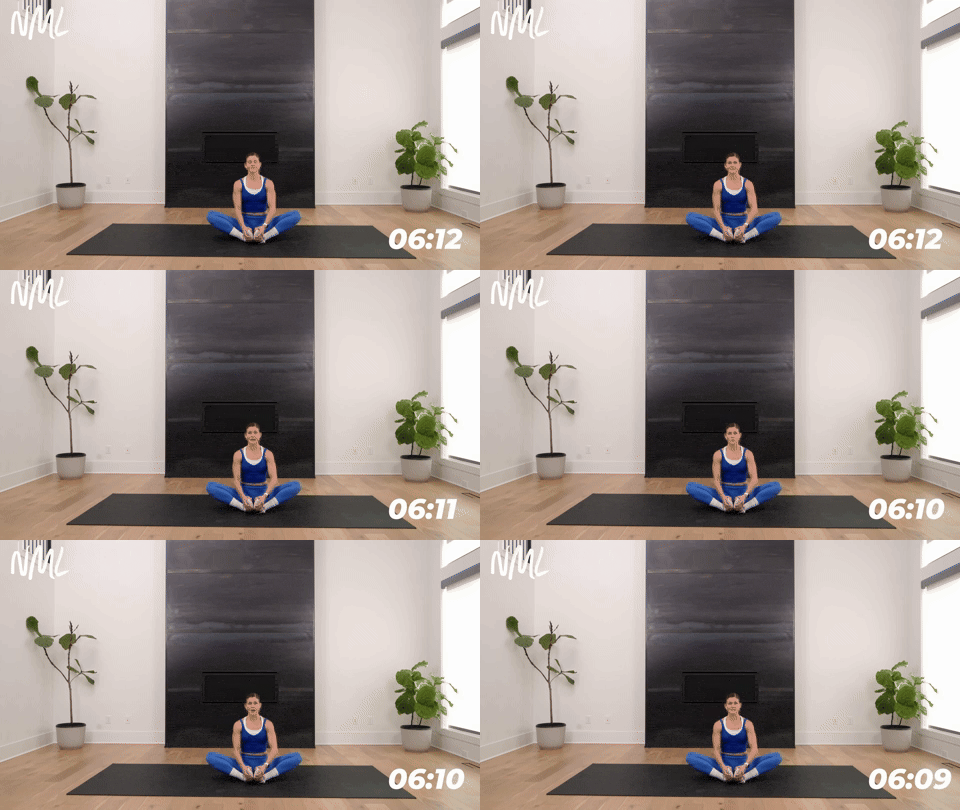
How to Do a Butterfly Stretch
- Sit on the floor with your knees bent and the bottoms of your feet touching.
- Bring your heels toward your body as far as feels comfortable and allow your knees to open out to the sides.
- Hold your feet or ankles and sit tall, keeping your shoulders relaxed and your chest open.
- Engage your core to maintain an upright posture as you gently allow your knees to move closer toward the floor.
- Hold the stretch and take slow, deep breaths, relaxing further into the position with each exhale.
8. Spiderman Step In
Targets: Hip abductors, hip flexors, groin, quadriceps, glutes, hamstrings and lower back.
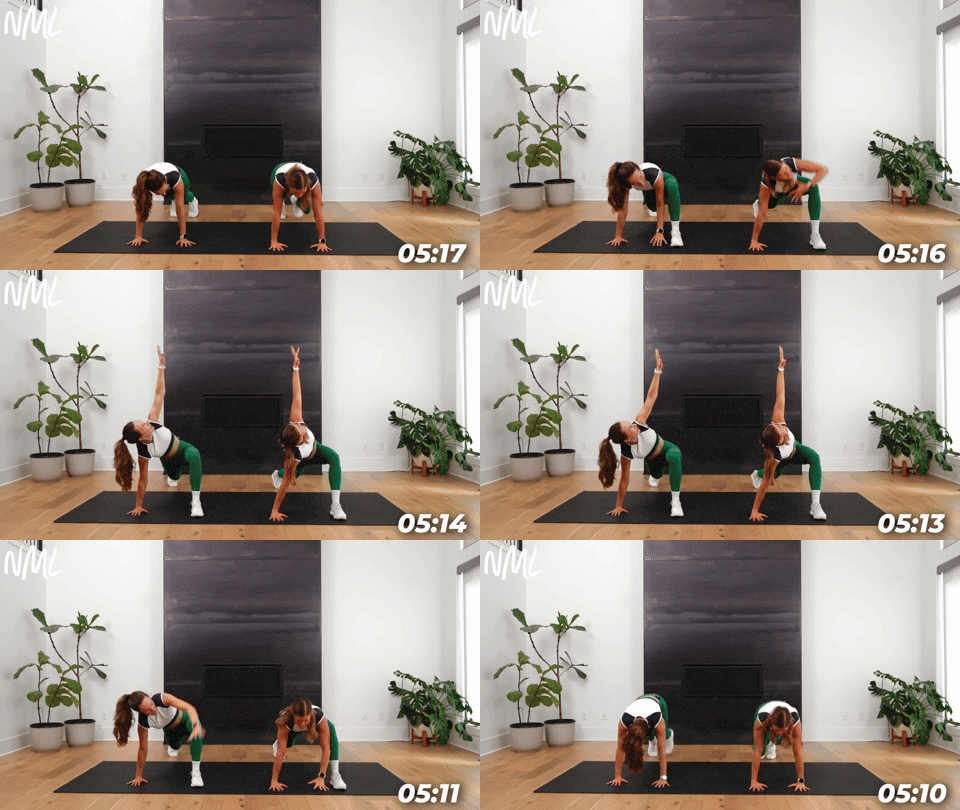
How to Do a Spiderman Step In
- Begin in a high plank with your hands directly beneath your shoulders, feet about hip-width apart and core engaged.
- Step your left foot forward and place it on the outside of your left hand. Keep your right leg extended behind you.
- Rotate your torso to the left as you reach your left arm toward the ceiling. Allow your hips to lower slightly as you settle into the stretch.
- Bring your left hand back to the floor and step your left foot back to return to the plank.
- Repeat on the right side, stepping your right foot outside your right hand and rotating your torso as you reach your right arm overhead.
- Continue alternating sides, moving slowly and using each repetition to work through a comfortable range of motion.
Modification(s): Lower your back knee to the floor for additional support and stability.
9. Frog Rocks
Targets: Inner thighs, outer hips, glutes and lower back.
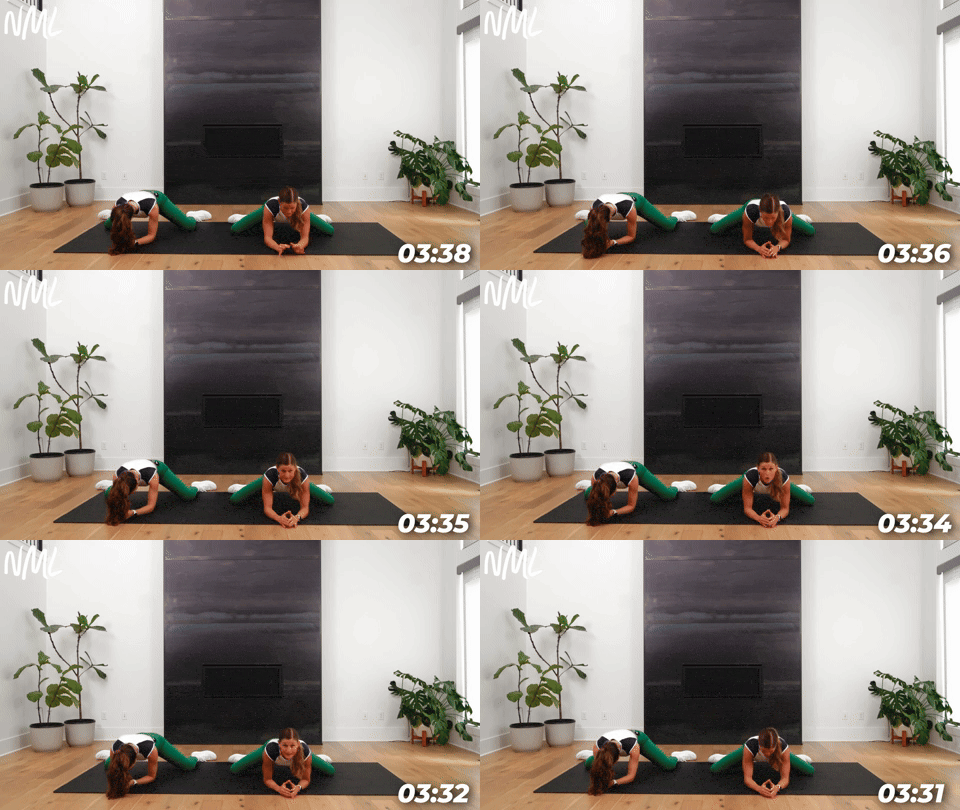
How to Do a Frog Rock
- Begin on your hands and knees with your wrists beneath your shoulders. Widen your knees beyond hip-width, keeping your shins on the floor.
- Lower onto your forearms, keeping your elbows underneath your shoulders.
- Keeping your knees wide, slowly press your hips back toward your heels until you feel a stretch through your inner thighs and hips.
- Rock your hips forward, bringing your shoulders back over your elbows and returning to the starting position.
- Continue rocking back and forth slowly, breathing steadily and staying within a comfortable range of motion.
10. 90/90 Hip Rotations
Targets: Hip joints, glutes, piriformis, hip flexors, hip abductors and hip adductors.
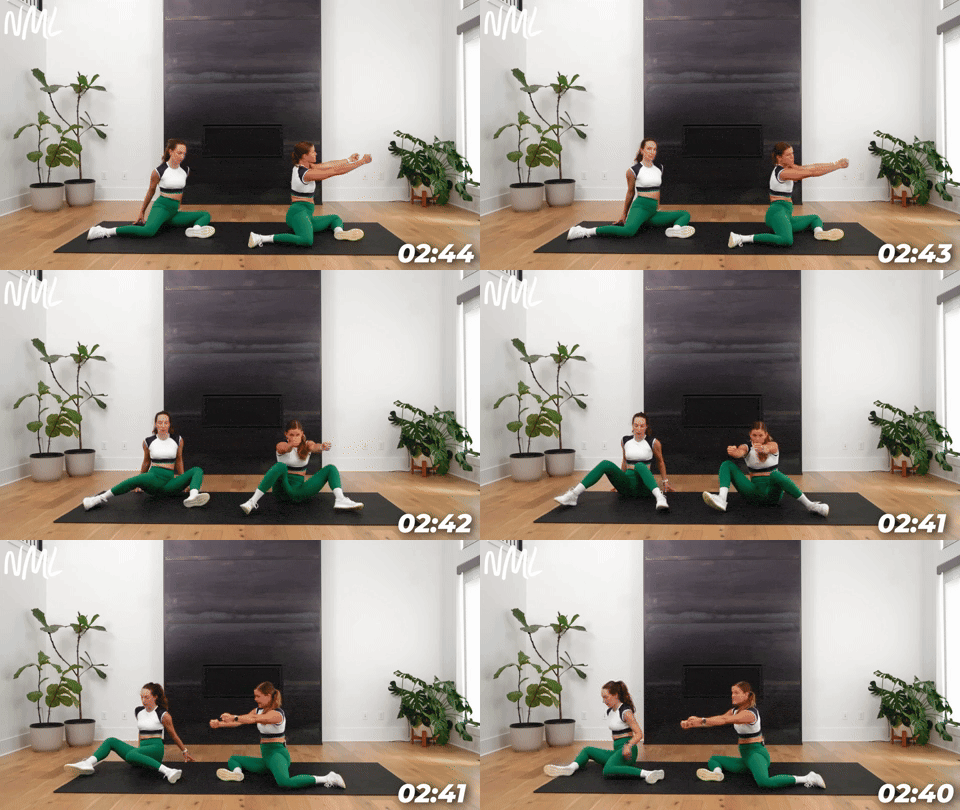
How to Do a 90/90 Hip Rotation
- Start in a seated position, right leg in front of you, left leg behind you and both legs bent at 90 degrees. Create some distance between your front right heel and your back left knee.
- Right shin is parallel to left shin (flat on the floor). Slowly lean forward, directly over your right shin (avoid leaning toward your right knee, lean directly into the middle of your shin).
- Think about driving your right knee and left knee into the mat at the same time as you hold this stretch. Hold this position for a few seconds.
- With each exhale, bring your chest closer to the floor.
- Shift to the other side so that your left leg is parallel in front of you, with your right leg behind you. Slowly lean forward, directly over your left shin, stretching the left outer glute and opening the right inner hip.
11. Deep Squat
Targets: Hips, knees, ankles, glutes and lower back.
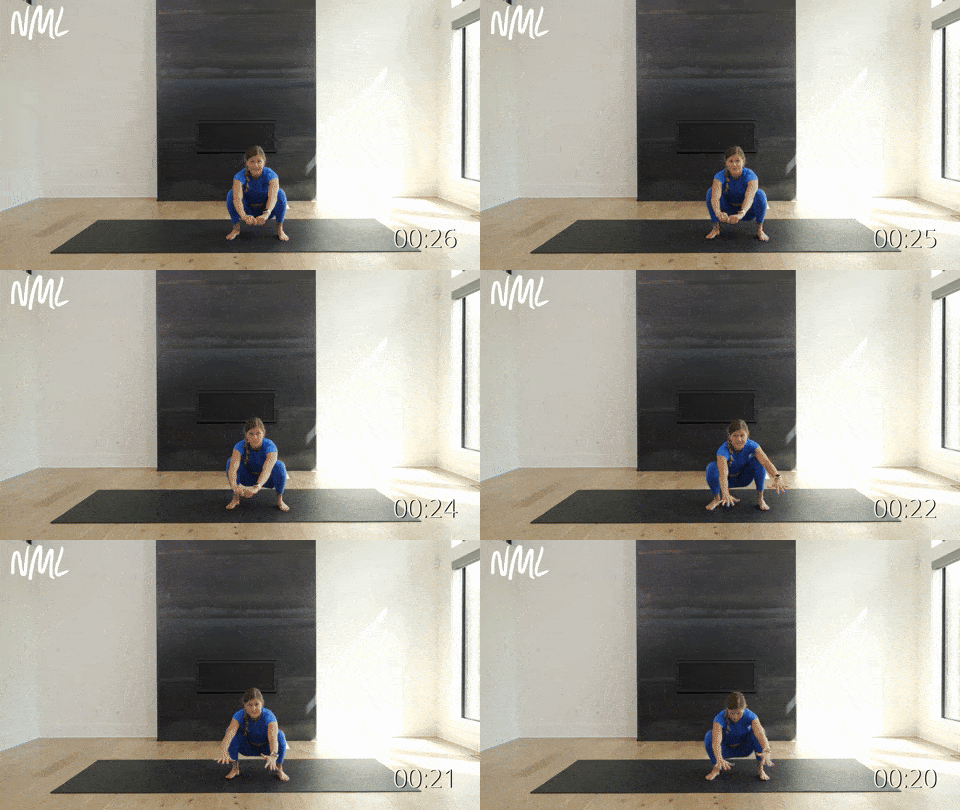
How to Do a Deep Squat
- Stand with your feet slightly wider than hip-width apart, toes turned out slightly.
- Bend your knees and lower your hips toward the floor, aiming to bring your hips below your knees while keeping your heels grounded.
- Bring your hands together in front of your chest and use your elbows to gently press your knees outward.
- Hold the deep squat isometric position with your chest lifted and spine long. Take a few slow breaths as you settle into the stretch.
- Optional: Gently shift your weight from side to side, moving deeper into one hip and then the other.
Modification(s): Reduce the depth of the squat or hold onto a sturdy surface if maintaining your balance is difficult.
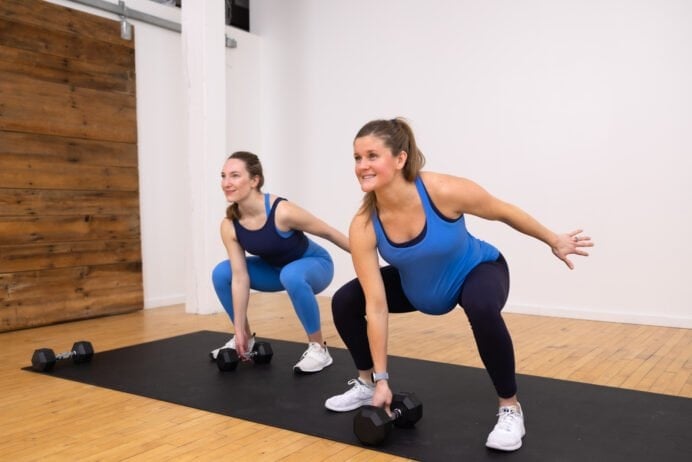
12. Cossack Squat
Targets: Inner thighs, glutes, hamstrings and hips.
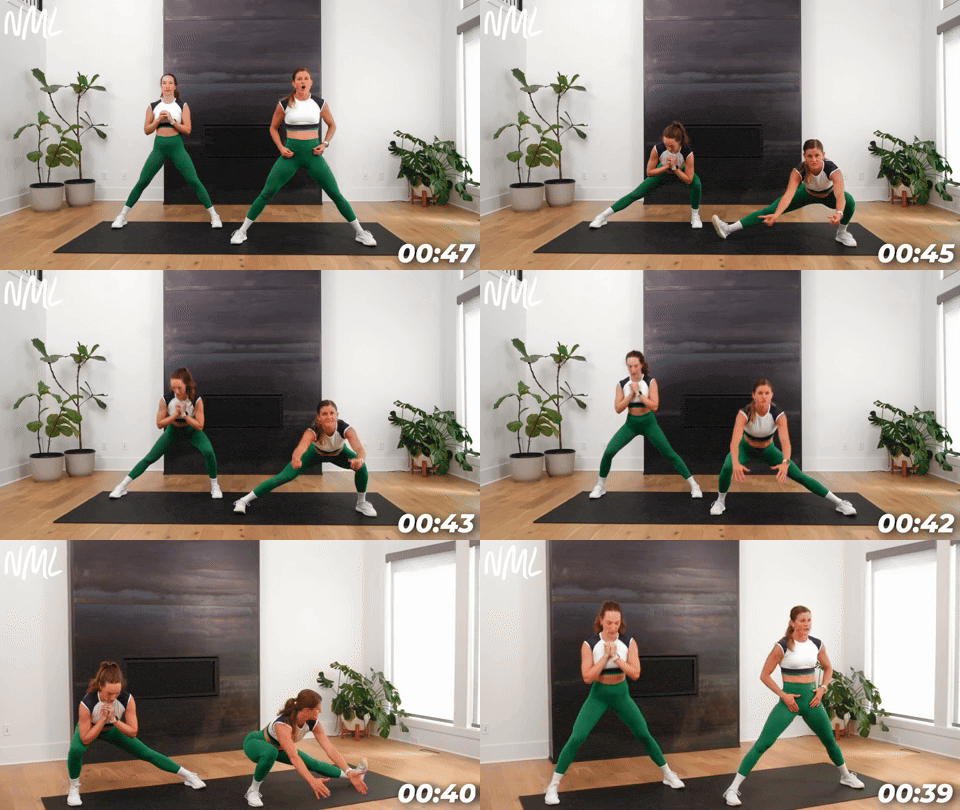
How to Do a Cossack Squat
- Stand with your feet wider than shoulder-width apart and your toes pointing forward. Keep your chest lifted and core engaged.
- Shift your weight into your left leg, bending your left knee and lowering your hips while keeping your right leg straight.
- Lift the toes of your right foot toward the ceiling, rotating through the hip to deepen the stretch through your inner thigh. Return your right toes to the floor.
- Move through center and shift your weight into your right leg, bending your right knee as your left leg extends straight.
- Lift the toes of your left foot toward the ceiling, then return them to the floor before shifting back to the opposite side.
Modification(s): Skip the toe lift and perform alternating lateral squats instead.
FAQs
How often should I do leg mobility exercises?
I recommend incorporating leg mobility exercises 2-3 times per week. You can also add a few mobility drills to your warm-up before workouts, especially before exercises like lateral lunges, leg swings, squats or other lower-body strength movements. Consistency matters more than doing a long mobility workout once in a while.
How long should a leg mobility routine take?
A lower-body mobility routine can take anywhere from 5-15 minutes, depending on how many exercises you include. Even a few minutes of dynamic mobility work can be useful when you’re short on time, while a longer session gives you more time to work on lower-body flexibility and range of motion.
Do leg mobility exercises help prevent injuries?
Mobility exercises can support athletic performance, joint range of motion and overall movement quality, which may help reduce some injury risk. That doesn’t mean mobility training is a guarantee against injury. A well-rounded fitness routine that includes strength training, mobility work and recovery time is the best approach.
Should I do leg mobility exercises before or after a workout?
I like dynamic mobility exercises before a workout because they help prepare your joints, muscles and soft tissues for movement without taking up much time. Exercises like 90/90 hip rotations and bodyweight squats work really well as part of a warm-up. Static stretches are generally better suited to the end of a workout or a separate mobility session.
More Exercises
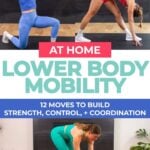
RoundupsPin This: 12 Lower Body Mobility Exercises

This post includes affiliate links. I do earn a commission for products purchased using these links (at no additional cost to you). Thank you for supporting Nourish Move Love, making the content you see on this blog possible.
no comments
Leave a Comment