Murph Workout for Beginners
The “Murph” is a well-known CrossFit WOD (workout of the day), attempted by thousands of people over Memorial Day. While this workout is incredibly demanding, it can be made accessible to beginners. From reducing reps to taking exercise modifications, here are a few ways to scale a Murph workout.
What Is The Murph Workout?
The “Murph” is a legendary CrossFit Hero workout (WOD) honoring Lieutenant Michael P. Murphy, a U.S. Navy SEAL who made the ultimate sacrifice in Afghanistan on June 28th, 2005. It’s a demanding test of physical and mental resilience, and while it’s a powerful way to honor fallen service members, it can seem daunting for beginners.
As written, a traditional Murph consists of:
Oftentimes a weighted vest is worn. For beginners, I recommend performing the workout with just your bodyweight.
While you can do the Murph any time, it’s most commonly performed on Memorial Day as a tribute to those who have served.
3 Ways for Beginners to Approach the Murph
While the Murph Challenge is certainly tough, it can be scaled. If you’ve never done a Murph before, the best beginner strategy is to scale the workout and break it down into manageable sets and repetitions. As a fitness trainer, here are a few things I’d recommend:
- Scaling: Modify the exercises to match your current fitness level. For example, try assisted pull-ups or push-ups at an incline.
- Partitioning: Instead of doing all 100 pull-ups, 200 push-ups and 300 squats consecutively, break them into smaller sets. A common beginner’s strategy is “Cindy” style, which is 5 pull-ups, 10 push-ups and 15 squats, repeated 20 times.
- Pacing: Start slowly and maintain a consistent pace throughout. Avoid going all-out at the beginning, as this can lead to early fatigue.
- Hydration and Nutrition: Stay well-hydrated before, during and after the workout. Proper nutrition is also crucial for performance and recovery.
- Listen to your body: If you experience severe pain or discomfort, stop and rest.
The Murph is a challenging workout, and it’s essential to listen to your body. Rhabdomyolysis (rhabdo) is a serious risk with high-volume workouts like the Murph. Proper scaling and pacing can help mitigate this risk. Heat-related illness is also a serious concern. Listen to your body and hydrate often.
For beginners, finishing the Murph is the primary goal, not speed. Don’t worry about achieving a “good” time. Focus on completing the workout safely and consistently. A beginner’s time can vary greatly, and it’s less about the clock and more about the accomplishment. It is not uncommon for a beginner to take over an hour to complete the workout, especially when scaling the movements. With consistent high-intensity training, you will see your time decrease.
Quarter Murph
If you’ve never done a Murph before, I’d recommend starting with a quarter Murph. In this scaled variation, you’ll reduce the total volume of reps and complete one-quarter of the reps you’d complete in a full Murph. I’d also recommend starting with a shorter run and omitting the second run at the end of the workout.
In a quarter Murph, you’ll perform:
True Half Murph
A half Murph workout is a progression from the quarter Murph. In this variation, you’ll reduce your reps to half of the total reps in a standard Murph. You’ll also complete a run at the beginning and end of the workout.
In a half Murph, you’ll perform:
If you’ve done a quarter Murph and are ready to complete more reps, but are not quite ready for a full Murph, try the half.
A Broken or Ten-Round Half Murph
Many people partition (or break down) the reps into smaller, more manageable chunks. This is how I personally approached training for the Murph.
A broken or ten-round half Murph requires completing half of the total reps per exercise in a standard Murph, though not consecutively. Instead, perform smaller rep sets to complete the half Murph.
In a broken or ten-round half Murph, you’ll perform:
- Run 0.5-1 mile
- 5 pull-ups (with bands)
- 10 push-ups (at incline)
- 15 air squats (squat to box)
- Repeat the strength exercises for 10 rounds
Before attempting any variation of a Murph, be sure to start with a dynamic warm-up.
Exercises With Modifications
1. Run
Targets: Cardiovascular endurance, quadriceps, hamstrings, glutes and calves.
How to Train for a Run
- Start with run-walk intervals. For example, you may start by running/jogging for 30 seconds, then walking for 30 seconds. Repeat this pattern until you run your target distance. As you build cardio endurance, gradually increase your running time while decreasing walking time. Continue increasing your running time until you are able to run for the entirety of the mile.
- Focus on cross-training. In addition to adding short and medium-distance runs to your training routine, I recommend following a strength training for runners workout plan that incorporates core, upper body and lower body exercises.
Common Mistakes: One of the most common mistakes made during the Murph is starting off the run portion too fast. You need to pace yourself to maintain energy for the rest of the workout, so pace yourself during the run portion.
Modifications: There are several ways to modify the run portion of a Murph. You can reduce the distance of the runs, walk the runs or omit the second run completely. You can also sub you can substitute jump rope, rowing or cycling.
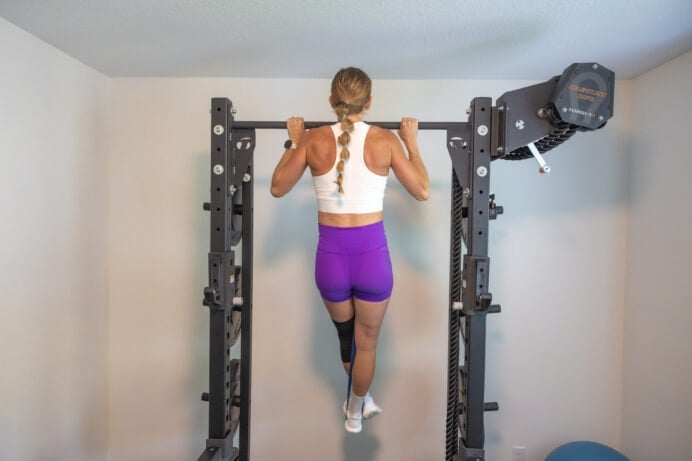
2. Pull-Ups
Targets: Latissimus dorsi (lats), biceps, rhomboids, trapezius (traps), deltoids (shoulders), forearms and core.
How to Do Pull-Ups
- Reach up and grip the pull-up bar with your palms facing away from your body (overhand grip), hands slightly wider than shoulder-width distance apart.
- Hang from the bar: Allow your body to hang freely with your arms fully extended.
- Perform the pull-up: Initiate the pull-up by squeezing your shoulder blades together and pulling your chest towards the bar. Keep your elbows pointed downward throughout the movement.
- Complete the pull-up: Continue to pull your body, pulling your chest up until your chin is above the bar, or as high as you can comfortably go. Keep your core engaged and your body straight throughout the movement.
- Lower yourself down: Slowly lower yourself back down to the starting position, extending your arms fully to return to the starting position.
Common Mistakes: Instead of thinking “chin over bar,” think “elbows to hips.” This encourages proper muscle engagement and prevents excess straining or swinging.
Modifications: If you can’t do a pull-up, start by performing assisted pull-ups with a resistance band (shown on the right). Then, increase max pull-up reps by following a pull-up progression program. When I tackled my first Murph attempts, I used pull-up assist bands, starting with lighter bands and adding heavier bands as the workout progressed. You might finish the workout with jumping or negative pull-ups. You could also substitute ring rows for pull-ups.
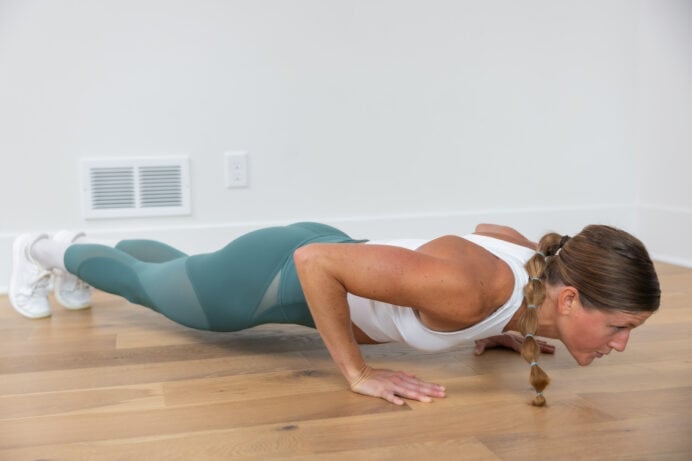
3. Push-Ups
Targets: Chest, shoulders, triceps, back, abs and core muscles.
How to a Do Push-Up
- Start in a high plank position with your shoulders stacked over your wrists, weight evenly distributed amongst all 10 fingers. Pull your kneecaps up towards your belly, feet hip-width apart. Option to place your hands on weights if you have wrist pain.
- Hold this plank position, maintaining a straight line with your body, gaze slightly in front of you.
- Slowly lower your chest down towards the ground as your elbows fall back towards your hips (not out to the sides).
- Once at the bottom of your push-up, exhale as you push back up into a high plank position.
Common Mistakes: Try tucking your elbows in slightly (about a 45-degree angle) rather than straight out (90-degree angle) to protect your shoulder joint. If you look at your body from above, your elbows should form an “A” shape, not a “T” shape.
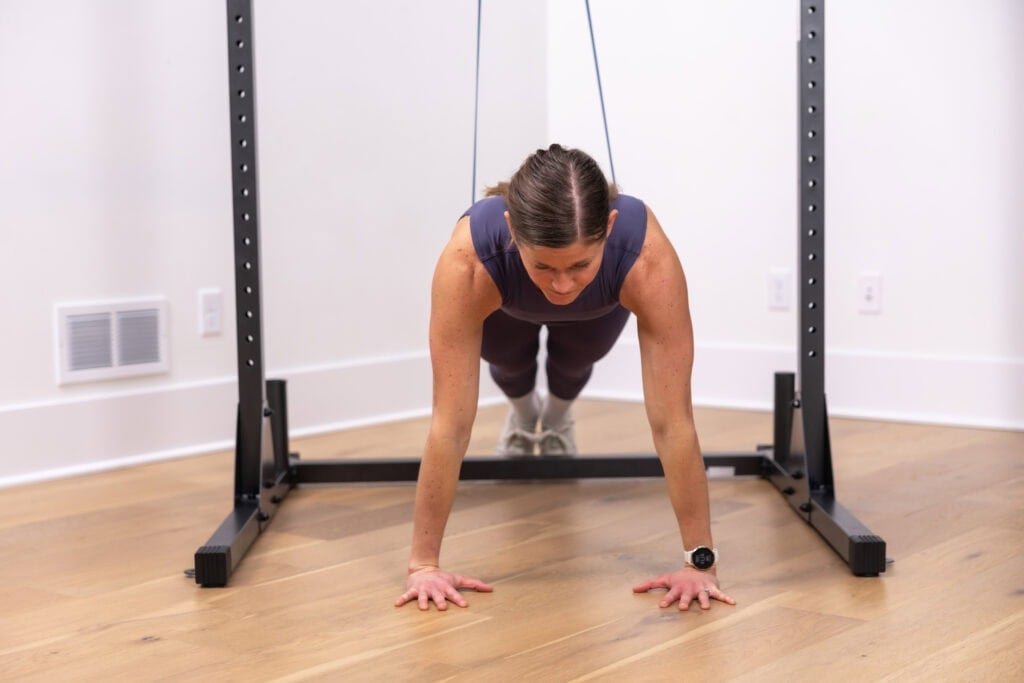
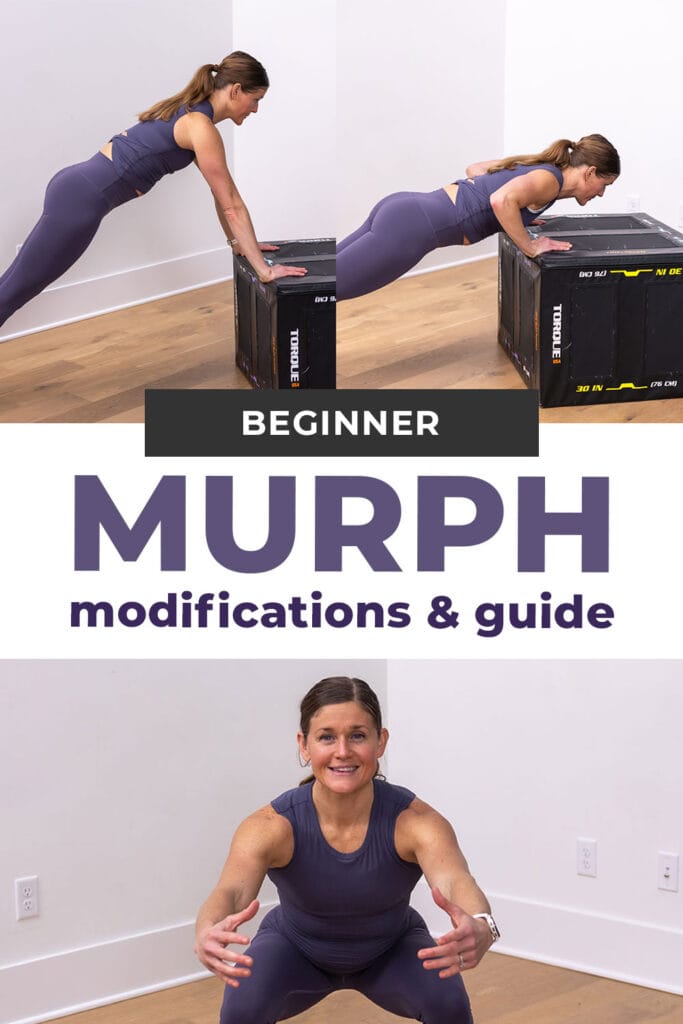
Modifications: If you can’t do a push-up on your toes, start with incline push-ups or resistance band push-ups, as shown below. When I was tackling my first Murph, I performed all push-ups from an incline. The push-ups remain the hardest part of the Murph for me. Now, I start with standard push-ups on my toes and finish with incline push-ups. Increase your max push-up reps by following a push-up progression program.
How to Do an Incline Push-Up
- Stand in front of your bench. The higher the surface, the easier the push-up will be.
- Plant your hands on the bench and step back into a high plank position. Your shoulders are stacked over your wrists, and your spine is neutral.
- Hold this incline plank position, maintaining a straight line with your body, as you slowly lower your chest towards the bench. Lead with your chest, elbows fall about 6 inches away from your body (not out to the sides).
- Once at the bottom of your push-up, exhale as you push back up into a high plank position.
How to Do a Push-Up with a Resistance Band
- Loop one end of a long loop resistance band over a pull-up bar or elevated surface, ensuring it’s secure.
- Plant your hands on the ground and step back into a high plank position. Shoulders are stacked over wrists, neutral spine. Position the band under your hips.
- Hold this plank position, maintaining a straight line with your body, as you slowly lower your chest towards the ground. Lead with your chest, elbows fall about 6 inches away from your body (not out to the sides).
- Once at the bottom of your push-up, exhale as you push back up into a high plank position.
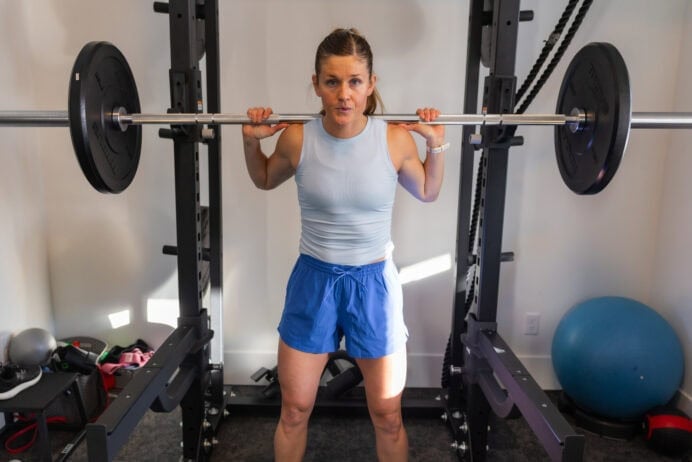
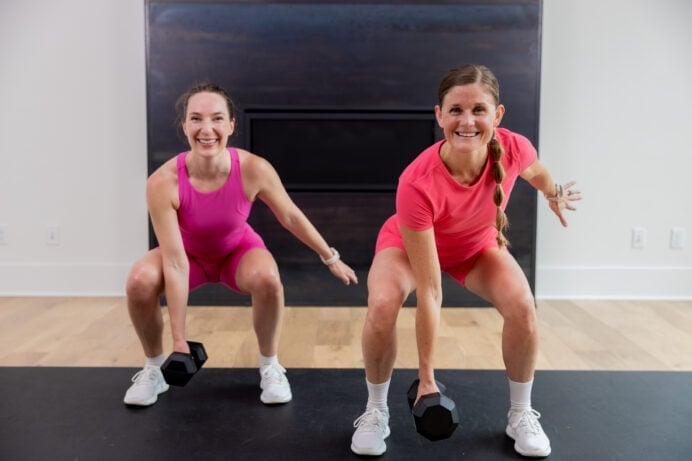
4. Squats
Targets: Legs, glutes, quads, hamstrings, hip flexors and core.
How to Do an Air Squat or Squat
- Stand with your feet shoulder-width apart, shoulders stacked over hips, and knees slightly bent. Think about engaging your core and keeping your spine neutral.
- Lower into a squat by sitting your hips back (as if sitting in a chair). Lower until your thighs are parallel to the floor, 90-degree bends in both knees.
- Drive through your heels to stand tall, completing one rep.
Common Mistakes: Don’t allow your knees to collapse in – instead, focus on pressing your knees out towards your pinky toes.
Modifications: Consider doing box squats or shallower squats to reduce intensity. Alternatively, if squats don’t feel good, substitute these lunge and squat alternatives. When I was doing this workout post-knee surgery, I would sub glute bridges for squats.
FAQs
How long does it take to train for Murph?
I recommend allowing a minimum of 4 to 8 weeks to build the strength and endurance needed to complete a Murph for the first time. For most people, the Murph’s biggest challenge is the endurance required to complete all the reps. I recommend adding more high volume workouts (like this squat workout or this thrusters workout) and high-intensity workouts (like this endurance training pyramid) to your workout plan. If you start out trying to complete too many reps, you’ll burn out and won’t recover well enough for your next training program. Start where you are, and do what you can!
What is the Mini Murph?
A “Mini Murph” is a scaled-down version of the CrossFit “Murph”. A scaled-down version of the workout is a great option for those who have never done a Murph before, or need a less intense challenge. A Mini Murph typically involves a shorter run in addition to fewer reps of the pull-ups, push-ups and squats.
How do CrossFit workouts work for beginners?
For beginners, a CrossFit workout of the day typically starts with learning fundamental movements, such as squats, deadlifts and presses. You can scale these exercises to your fitness level. You should always focus on proper form over speed or weight used. If you’re a beginner to CrossFit gyms, it’s really important to seek guidance from a coach to ensure a safe and effective workout program.
Keep Going
The Murph is an extremely challenging feat, but an incredible goal to strive towards. Start with a quarter or half murph, or break your reps down into smaller, more manageable sets. By scaling this workout appropriately and focusing on safe progression, beginners can experience its benefits and honor Lt. Michael P. Murphy’s legacy.
Keep in mind that this isn’t the type of CrossFit workout you should do weekly or even monthly. Save it for Memorial Day and use it as a way to track progress year-over-year.
If you’ve never done a Murph before but want to try this challenge, start with a variation and work on scaling it up from that benchmark. Take your time, take modifications as needed, and scale the total reps to fit your current fitness level. You don’t need to compete in the Crossfit games or PR your reps to complete a successful hero WOD.
Remember that the basis of this challenge is to honor the sacrifice of those who have served. However you choose to tackle a Murph, you’re honoring those who have served.
More Workouts
Strength TrainingPin This Beginner Murph Workout
no comments